
Well, it’s the holiday season again. I enjoy trying to make at least a couple gifts each year if I have time. This year I have plans to make my kids a couple things and I need some corner jigs for the project. I shopped around a bit but I’m really not a fan of the plastic ones from Rockler and I sure don’t want to spend $300 (!!!) on the metal ones that Woodpeckers offers from time to time as a OneTime Tool.

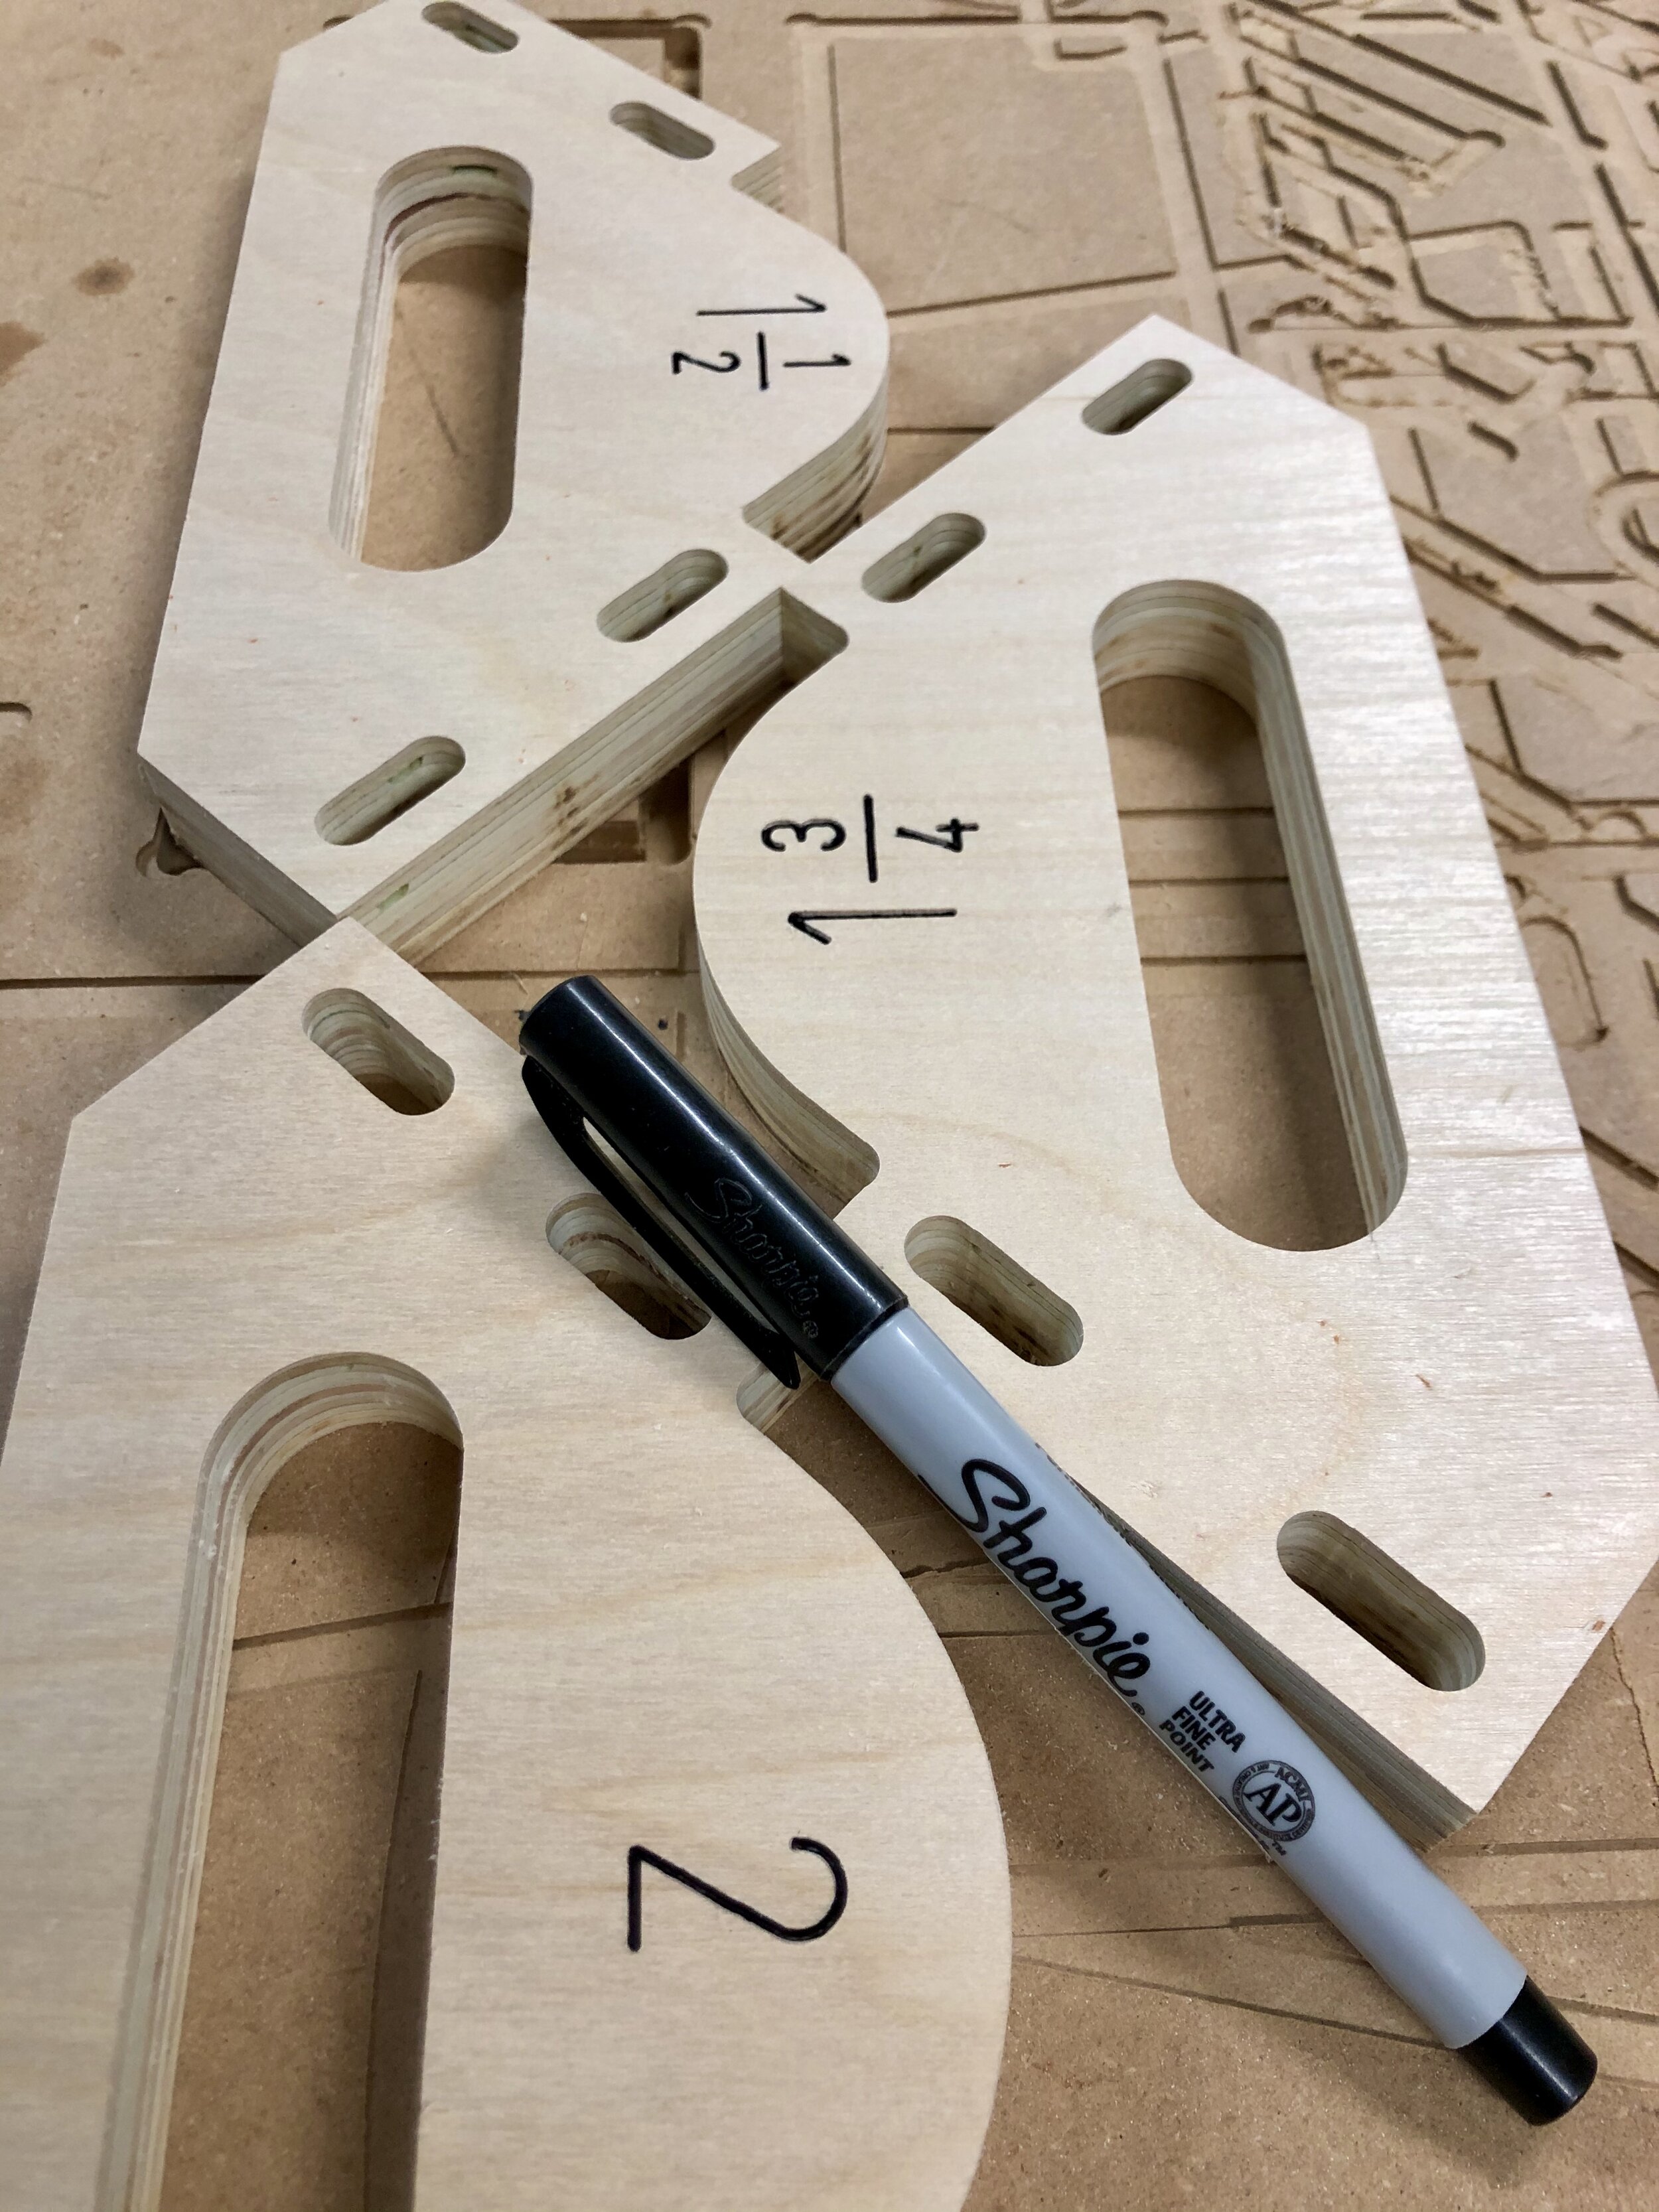
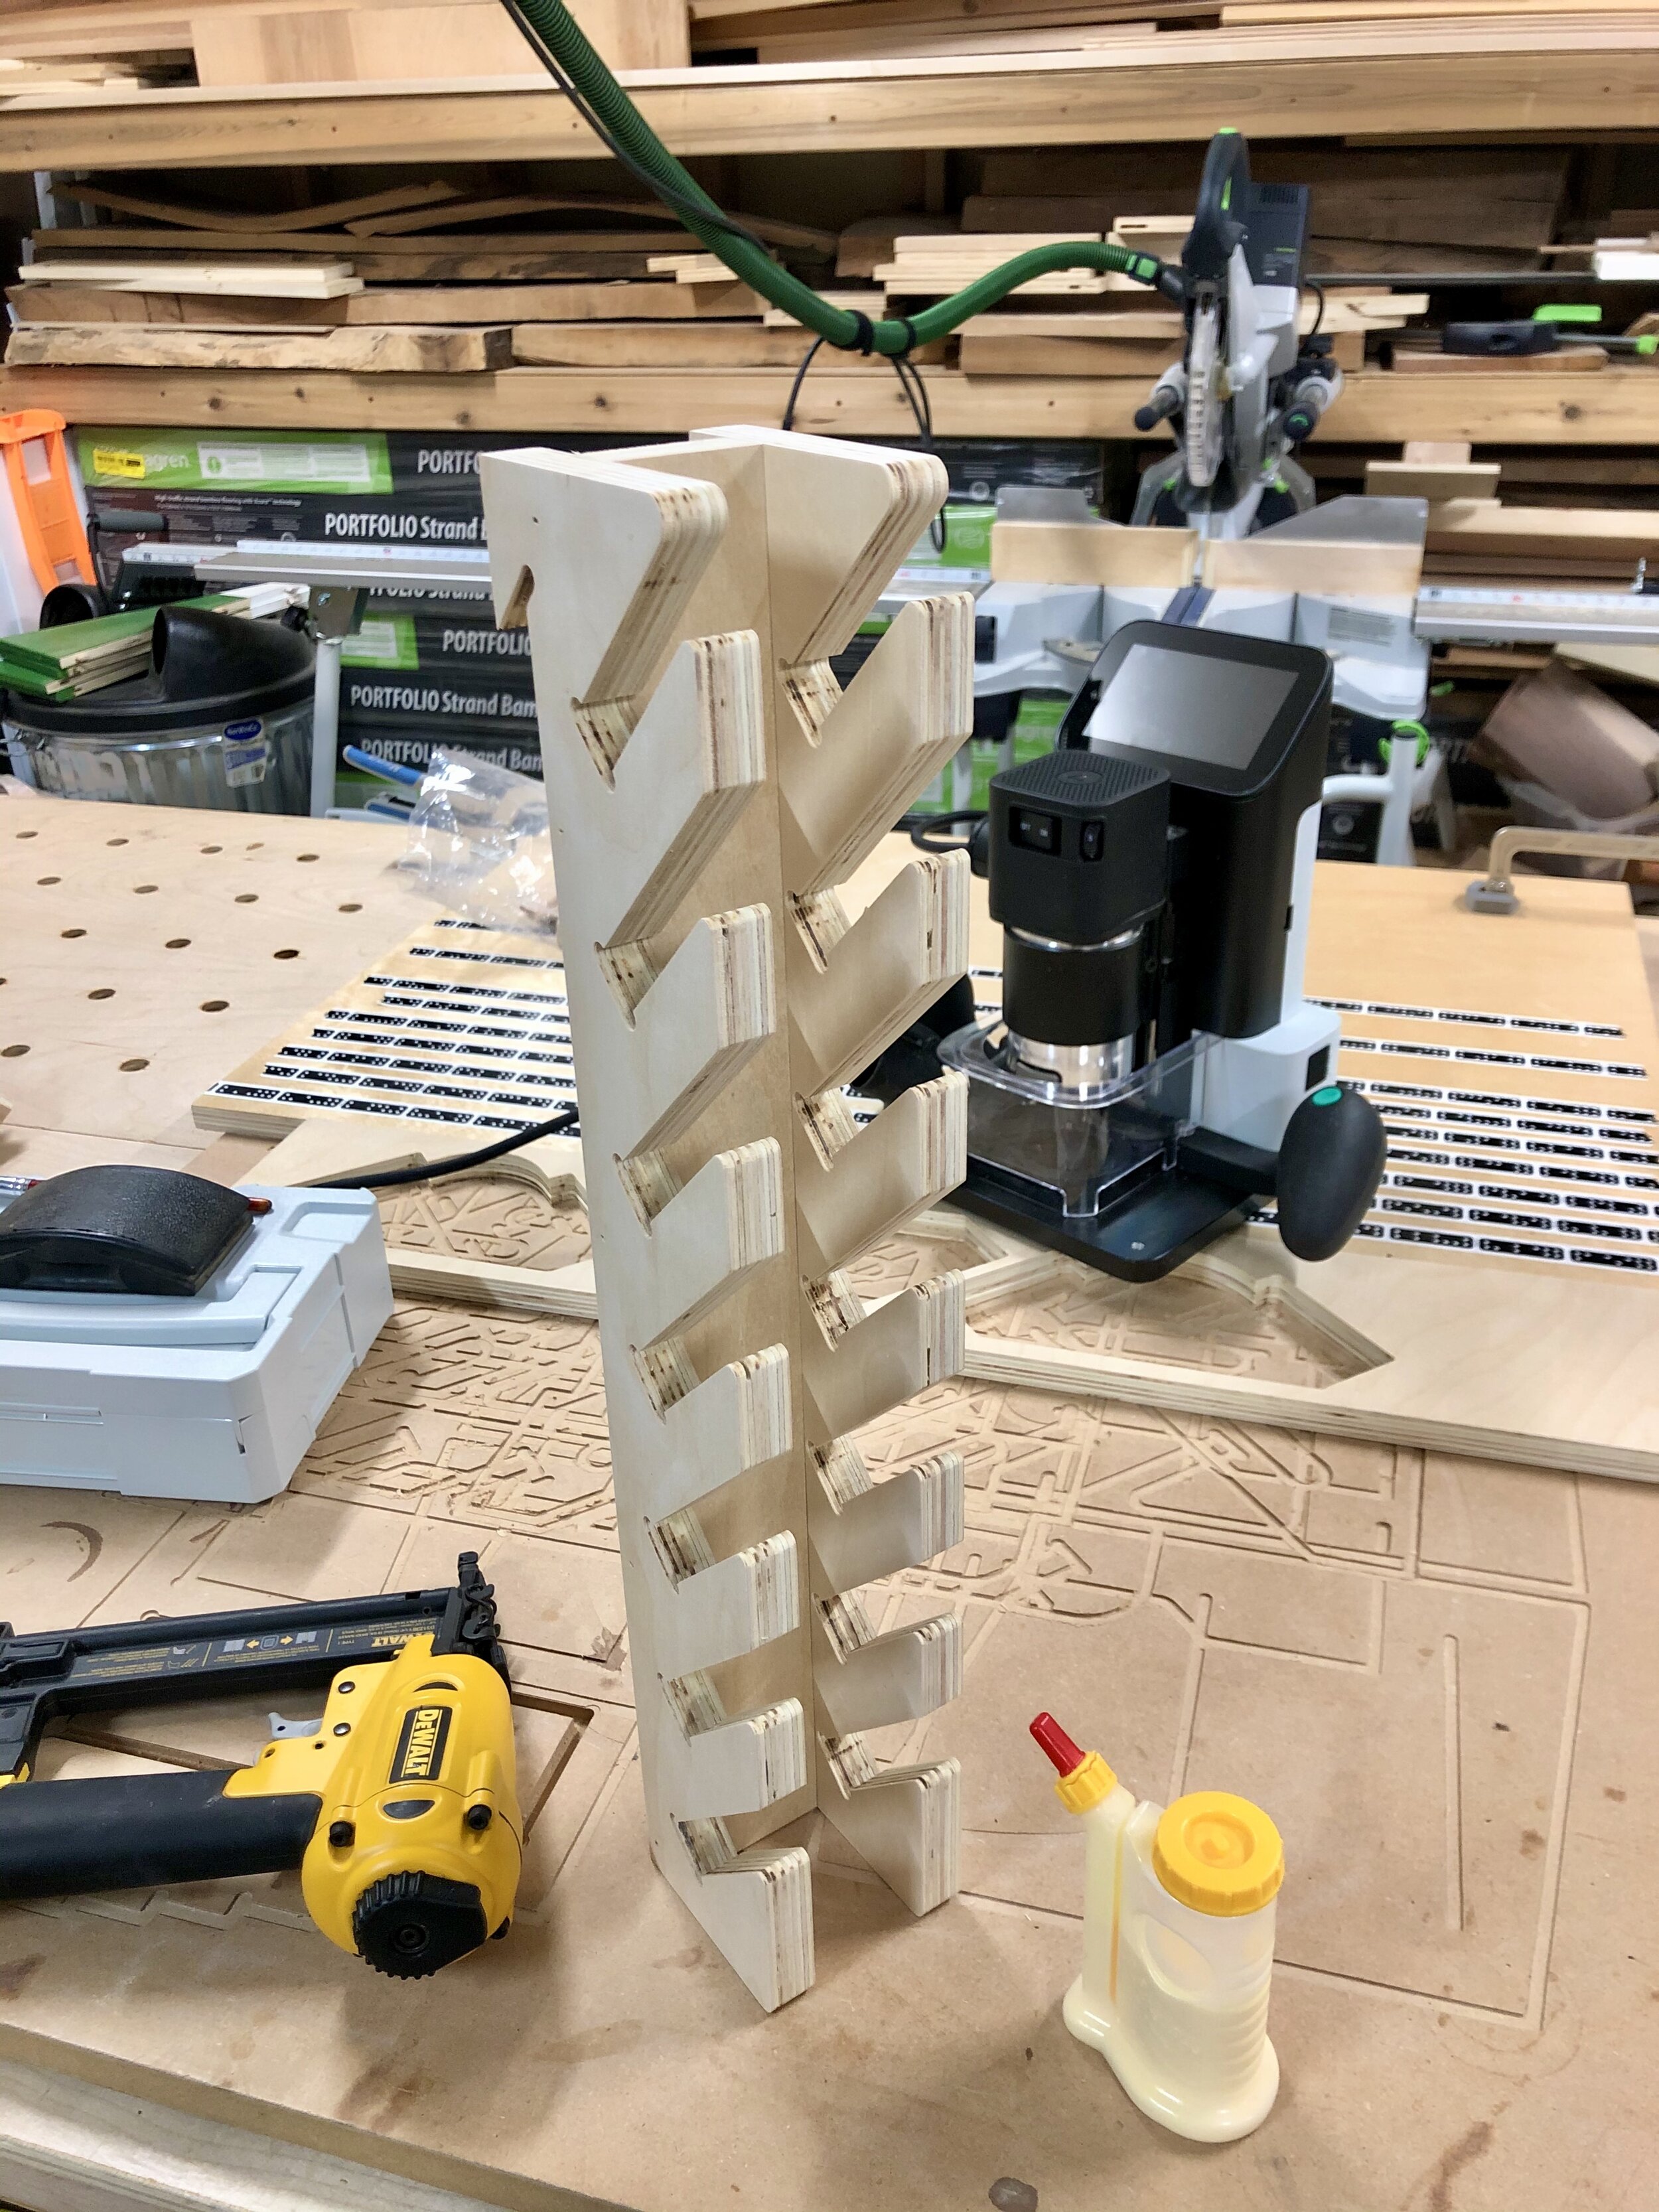
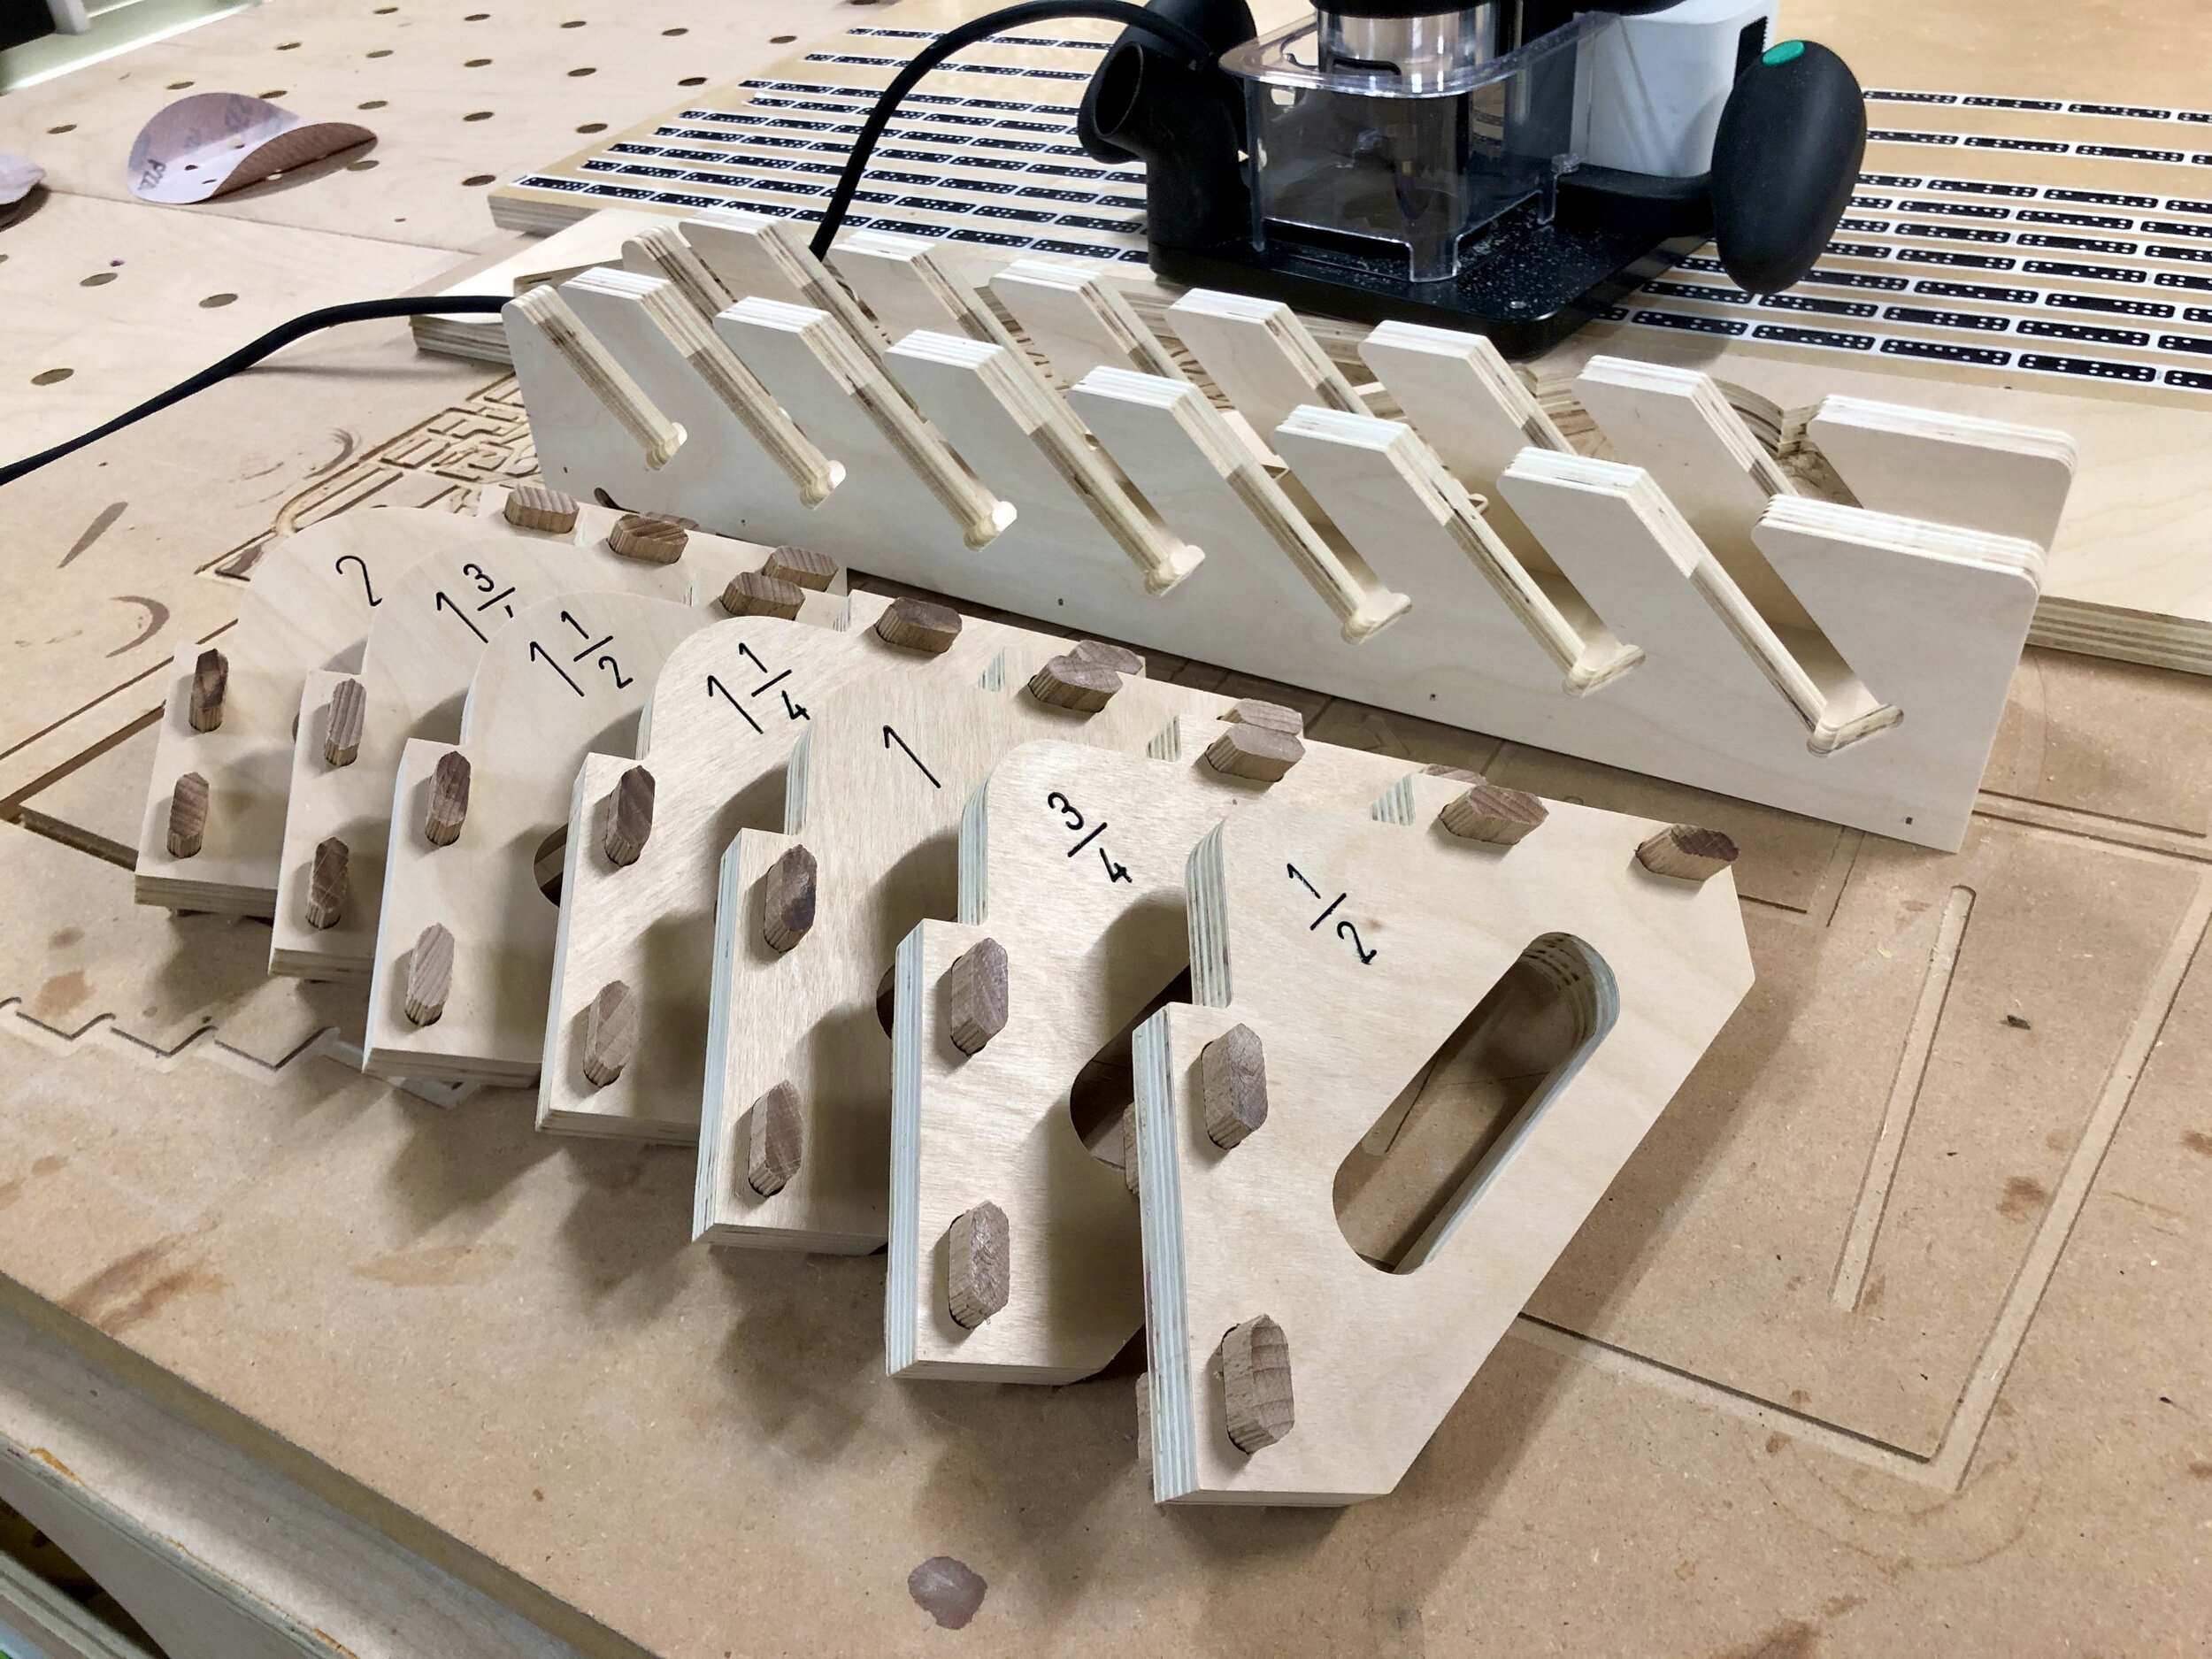
So, I quickly designed a template in Adobe Illustrator and made separate files for each jig ranging from 1/2” to 2” radius. Of course, I needed a place to store them so I also designed a french cleat storage rack to keep them organized and out of the way.
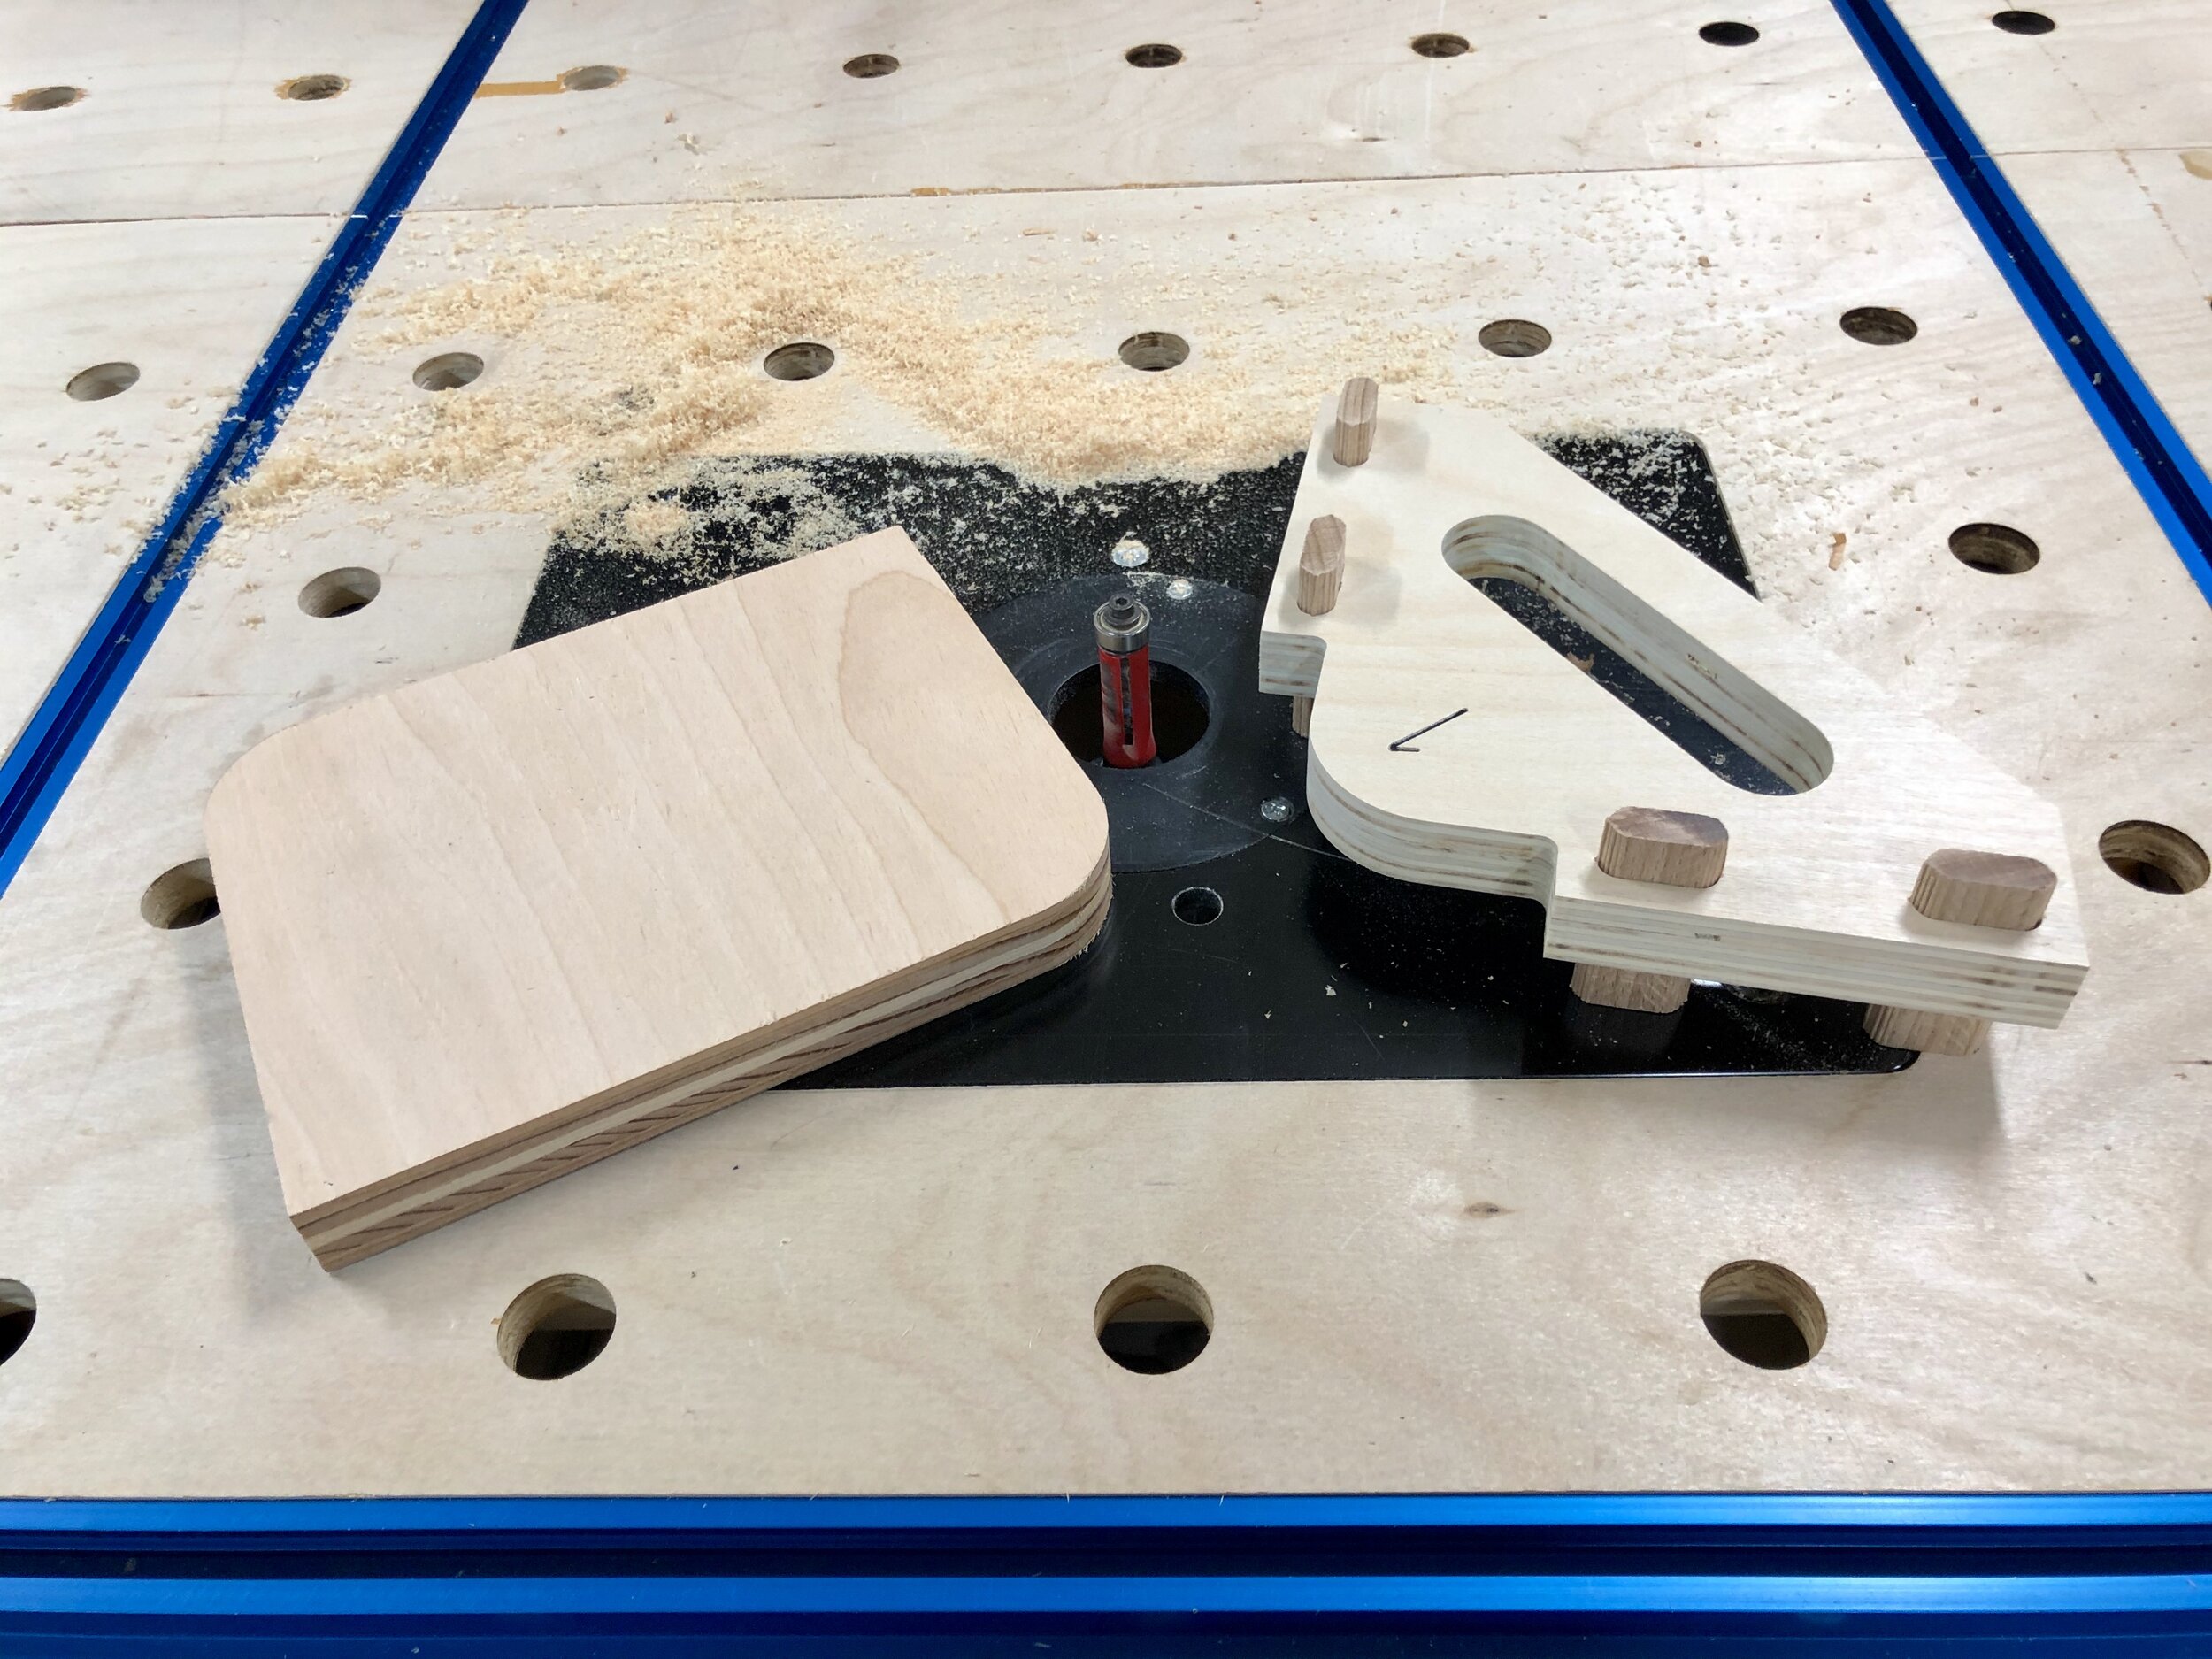
There are a few reasons I used the Festool Dominoes as the stops.
It was easy :-)
They’re sturdy because they are solid wood
They can be adjusted for different material thicknesses
I can easily replace them if needed
Make a set for yourself
Here is the complete set of jigs and french cleat wall rack:

Click to view full .svg file (individual files are linked below)
If you have a Shaper Origin, below are the steps for making your own set of corner jigs.
You may use either the file linked above or the individual files below.
If using the complete file above, you’ll need a piece of 3/4” plywood at least 27.5”W x 17”H. Or each jig can be cut from a 6” x 6” piece of ply.
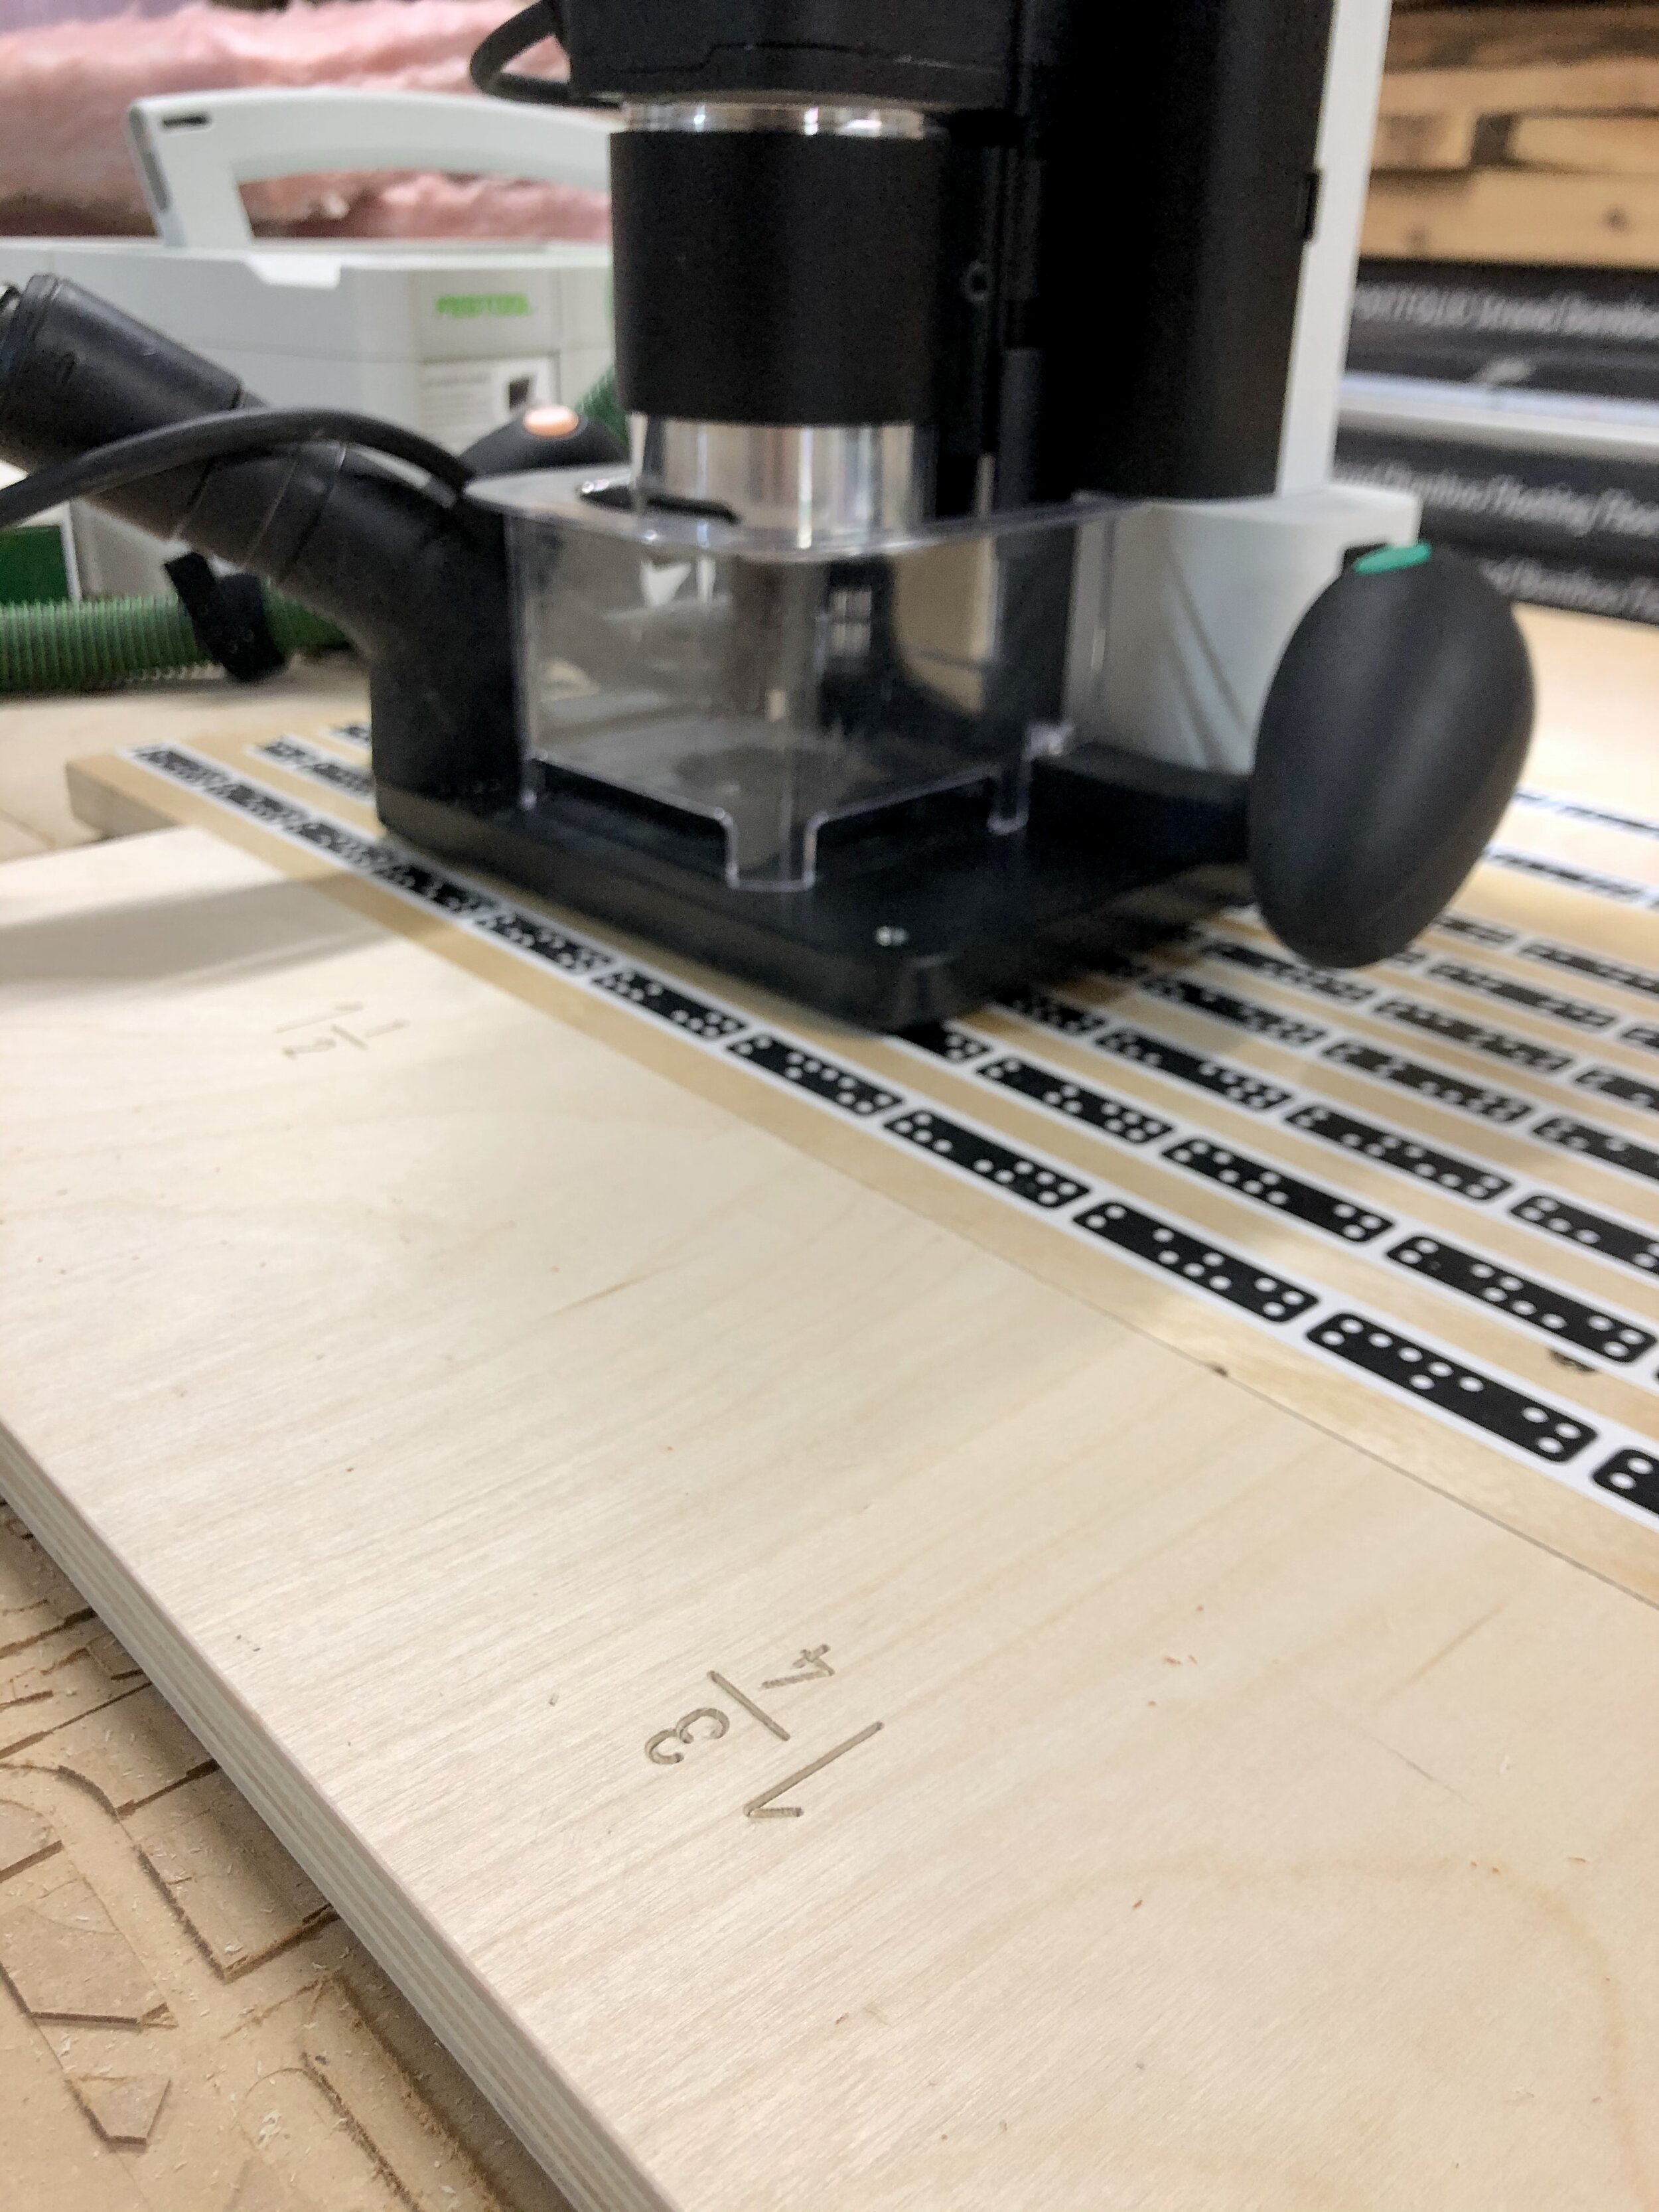
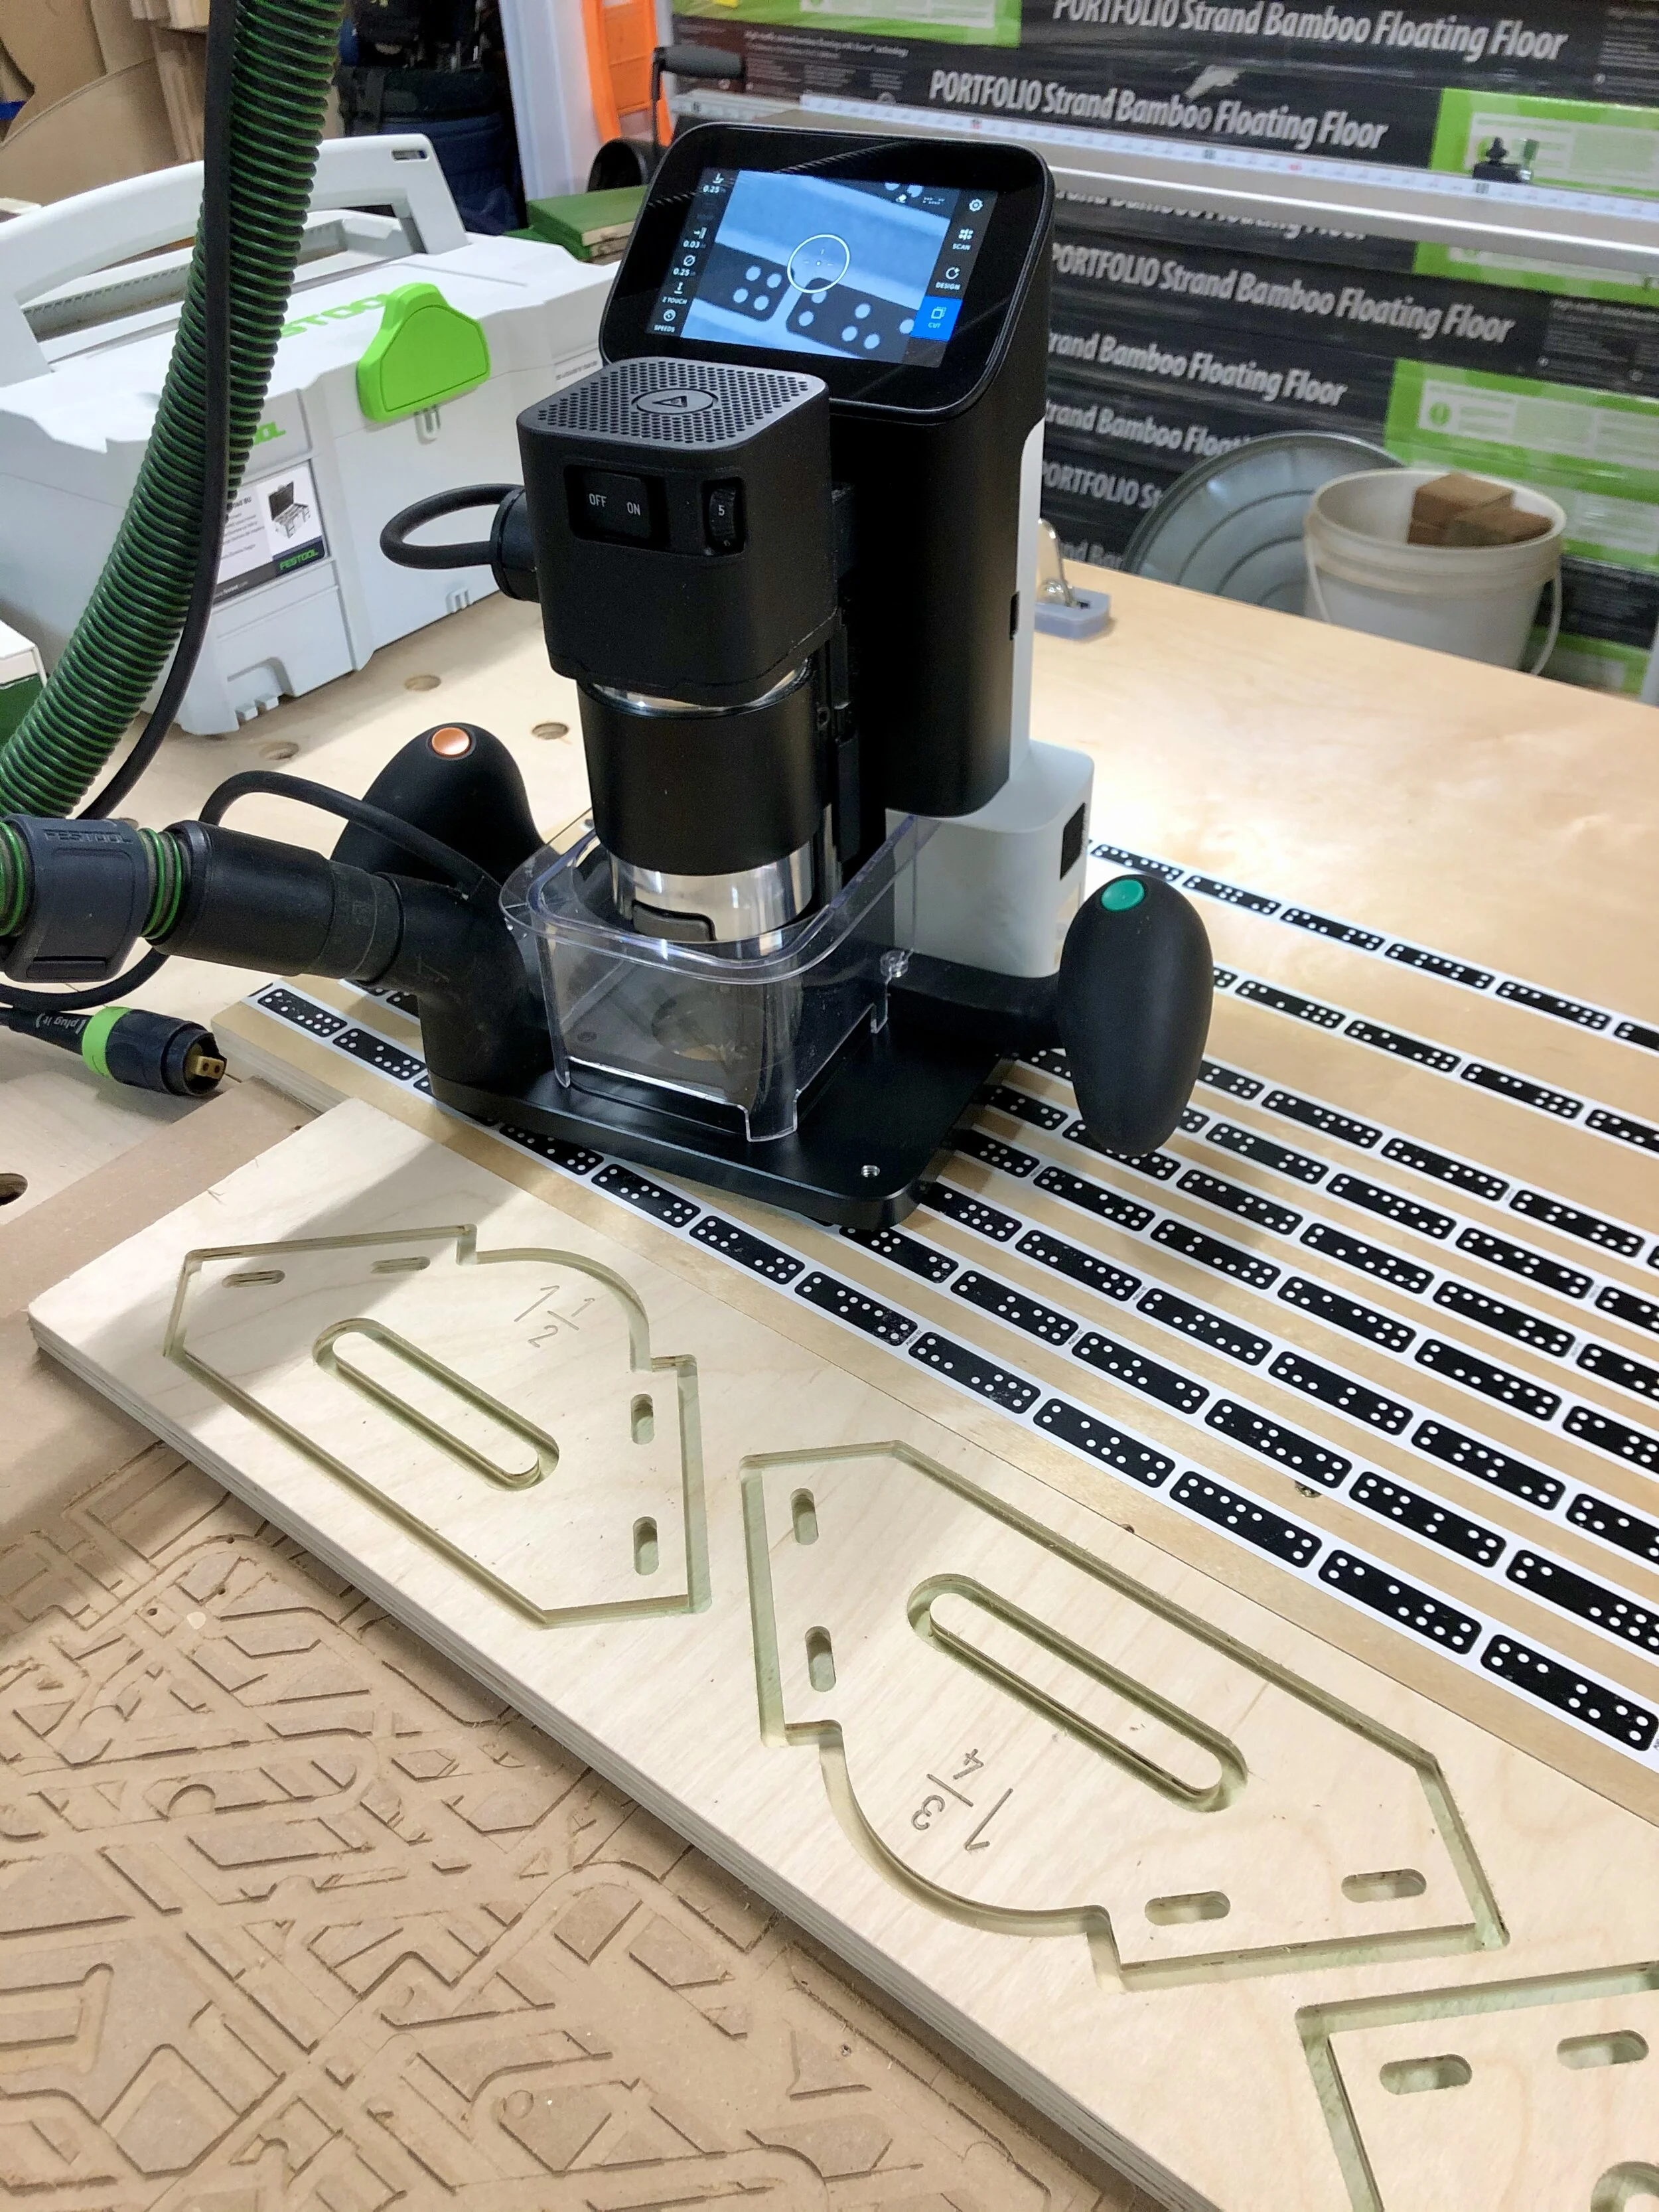
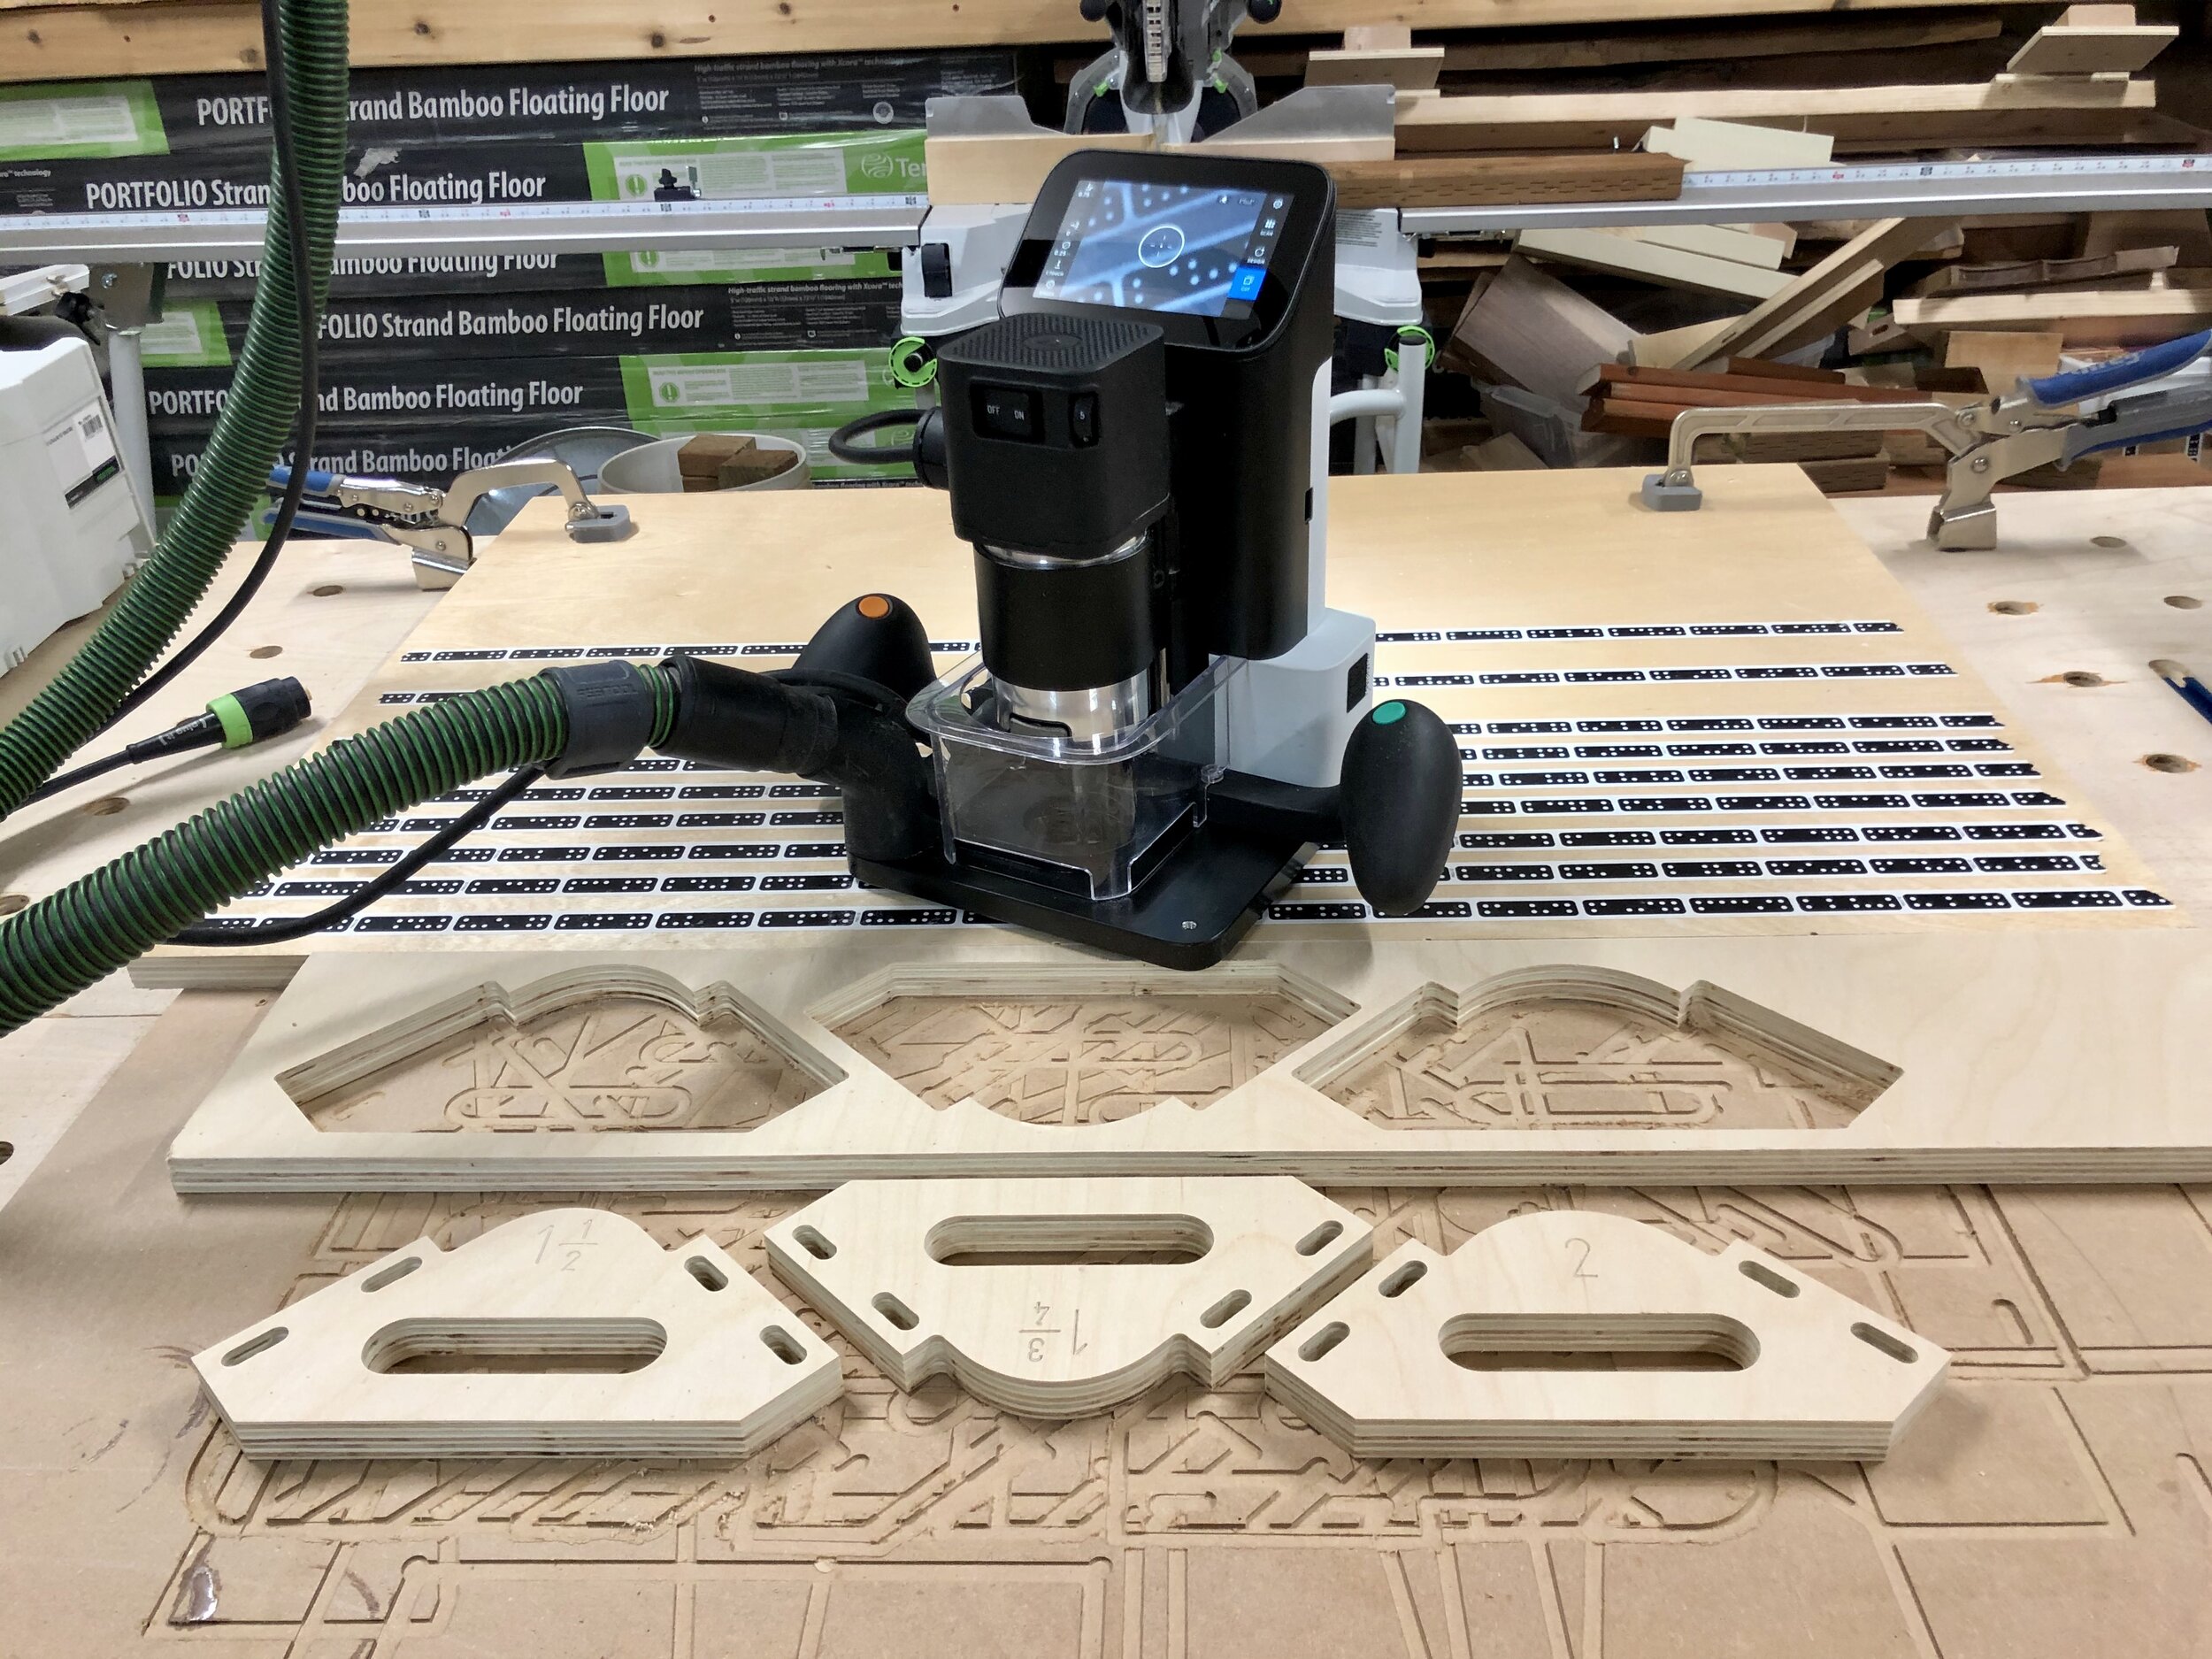
After placing the image on your material, use an engraving bit to engrave all of the numbers.
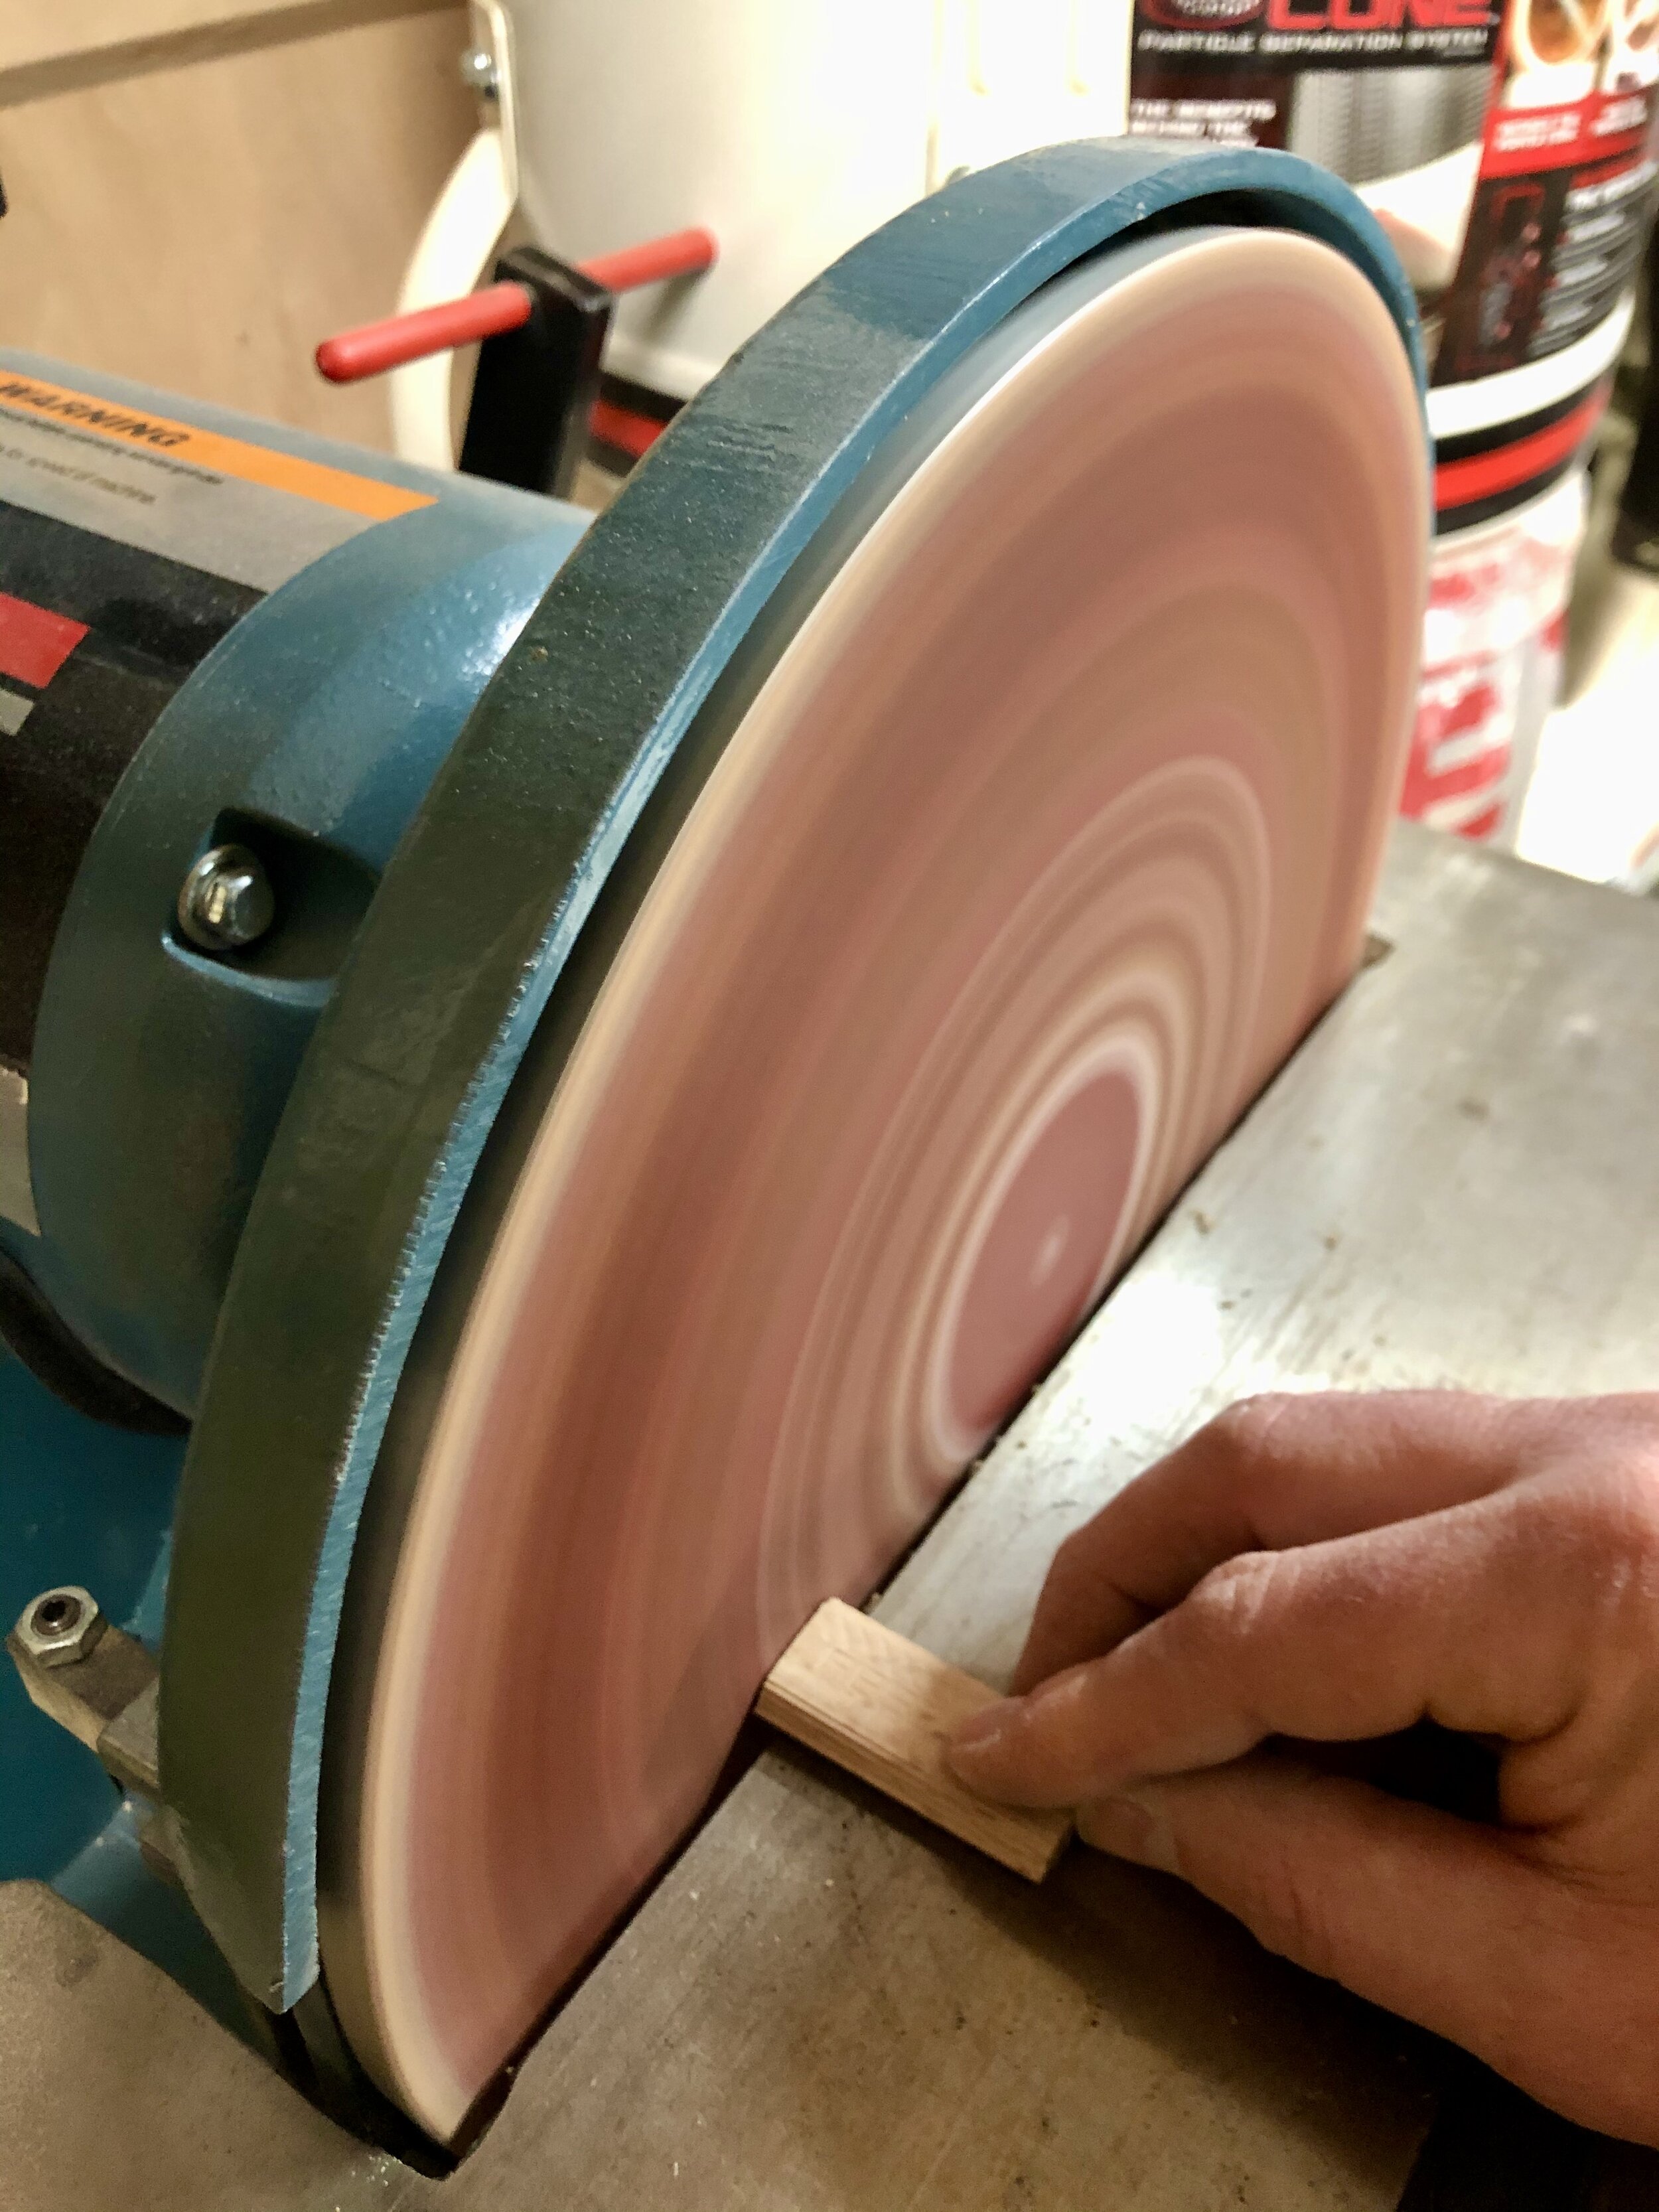
Now use the 1/4” bit to make three passes around all of the parts.
Cut depth = 1/4”, Offset = .03”
Cut Depth = 1/2”, Offset = .03”
Final Cut - Cut Depth = 3/4”, Offset = 0” (take it slow for a clean cut when going around the corner that will be used for guide bearing)
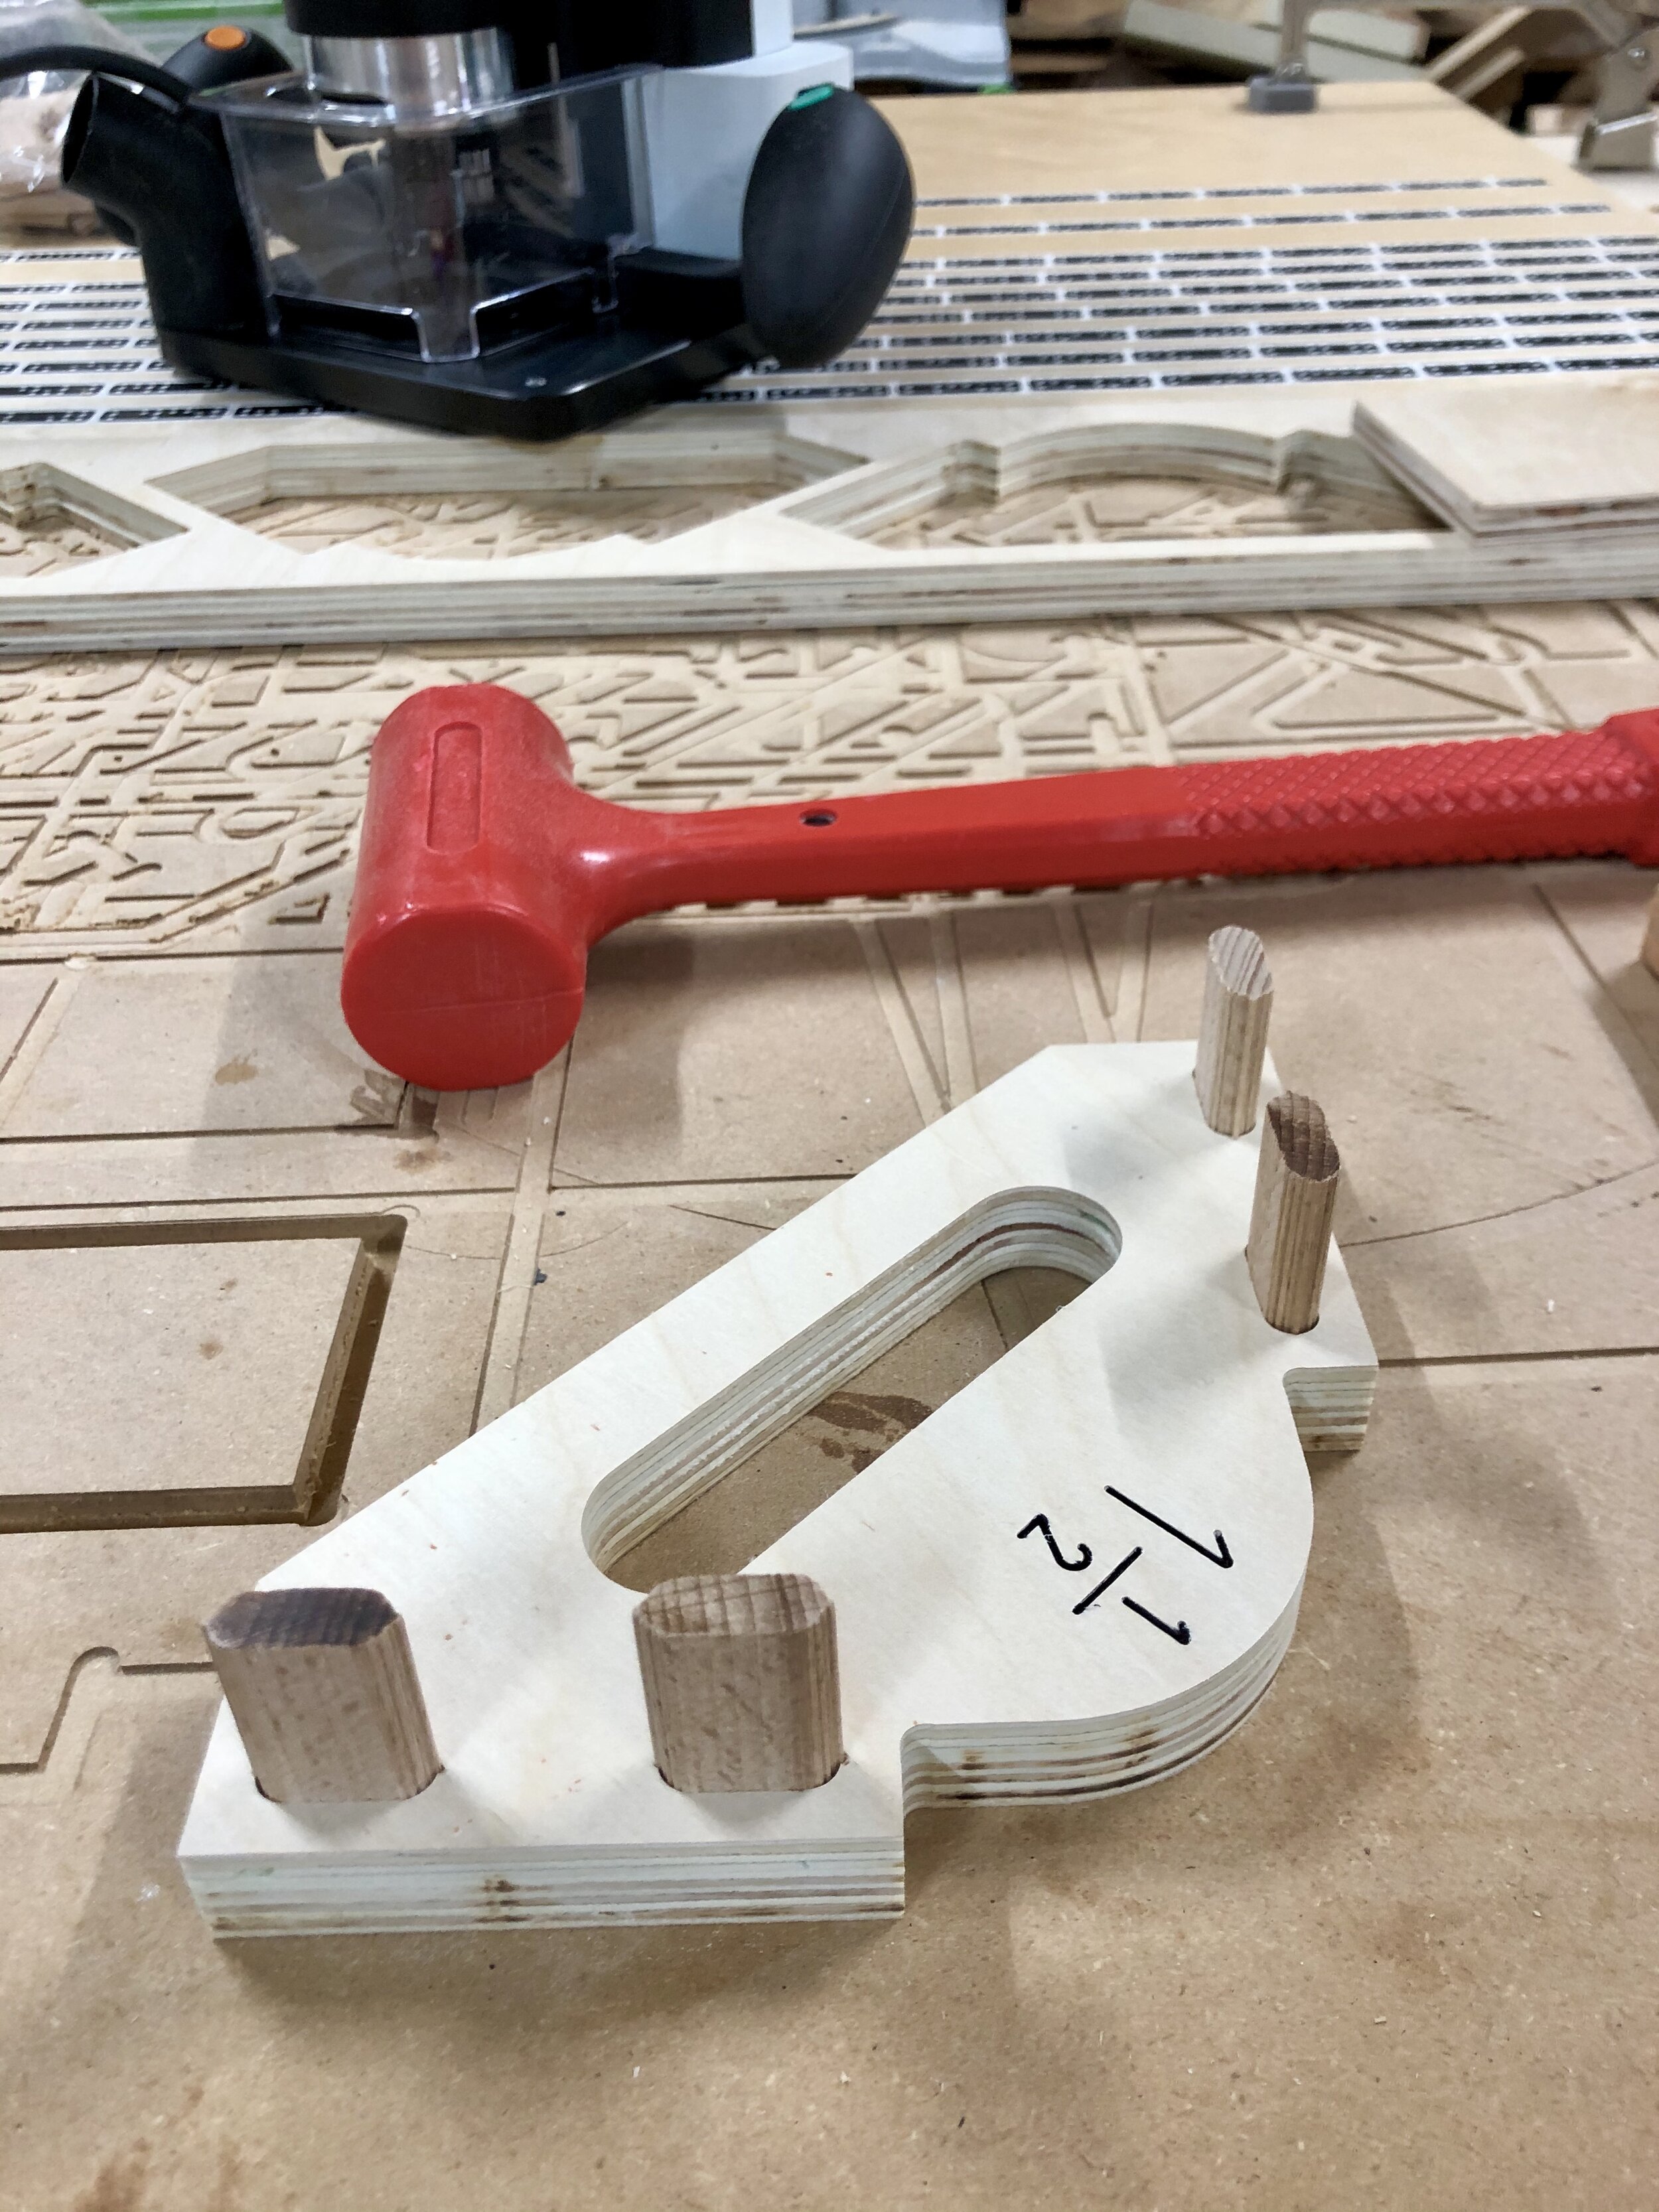
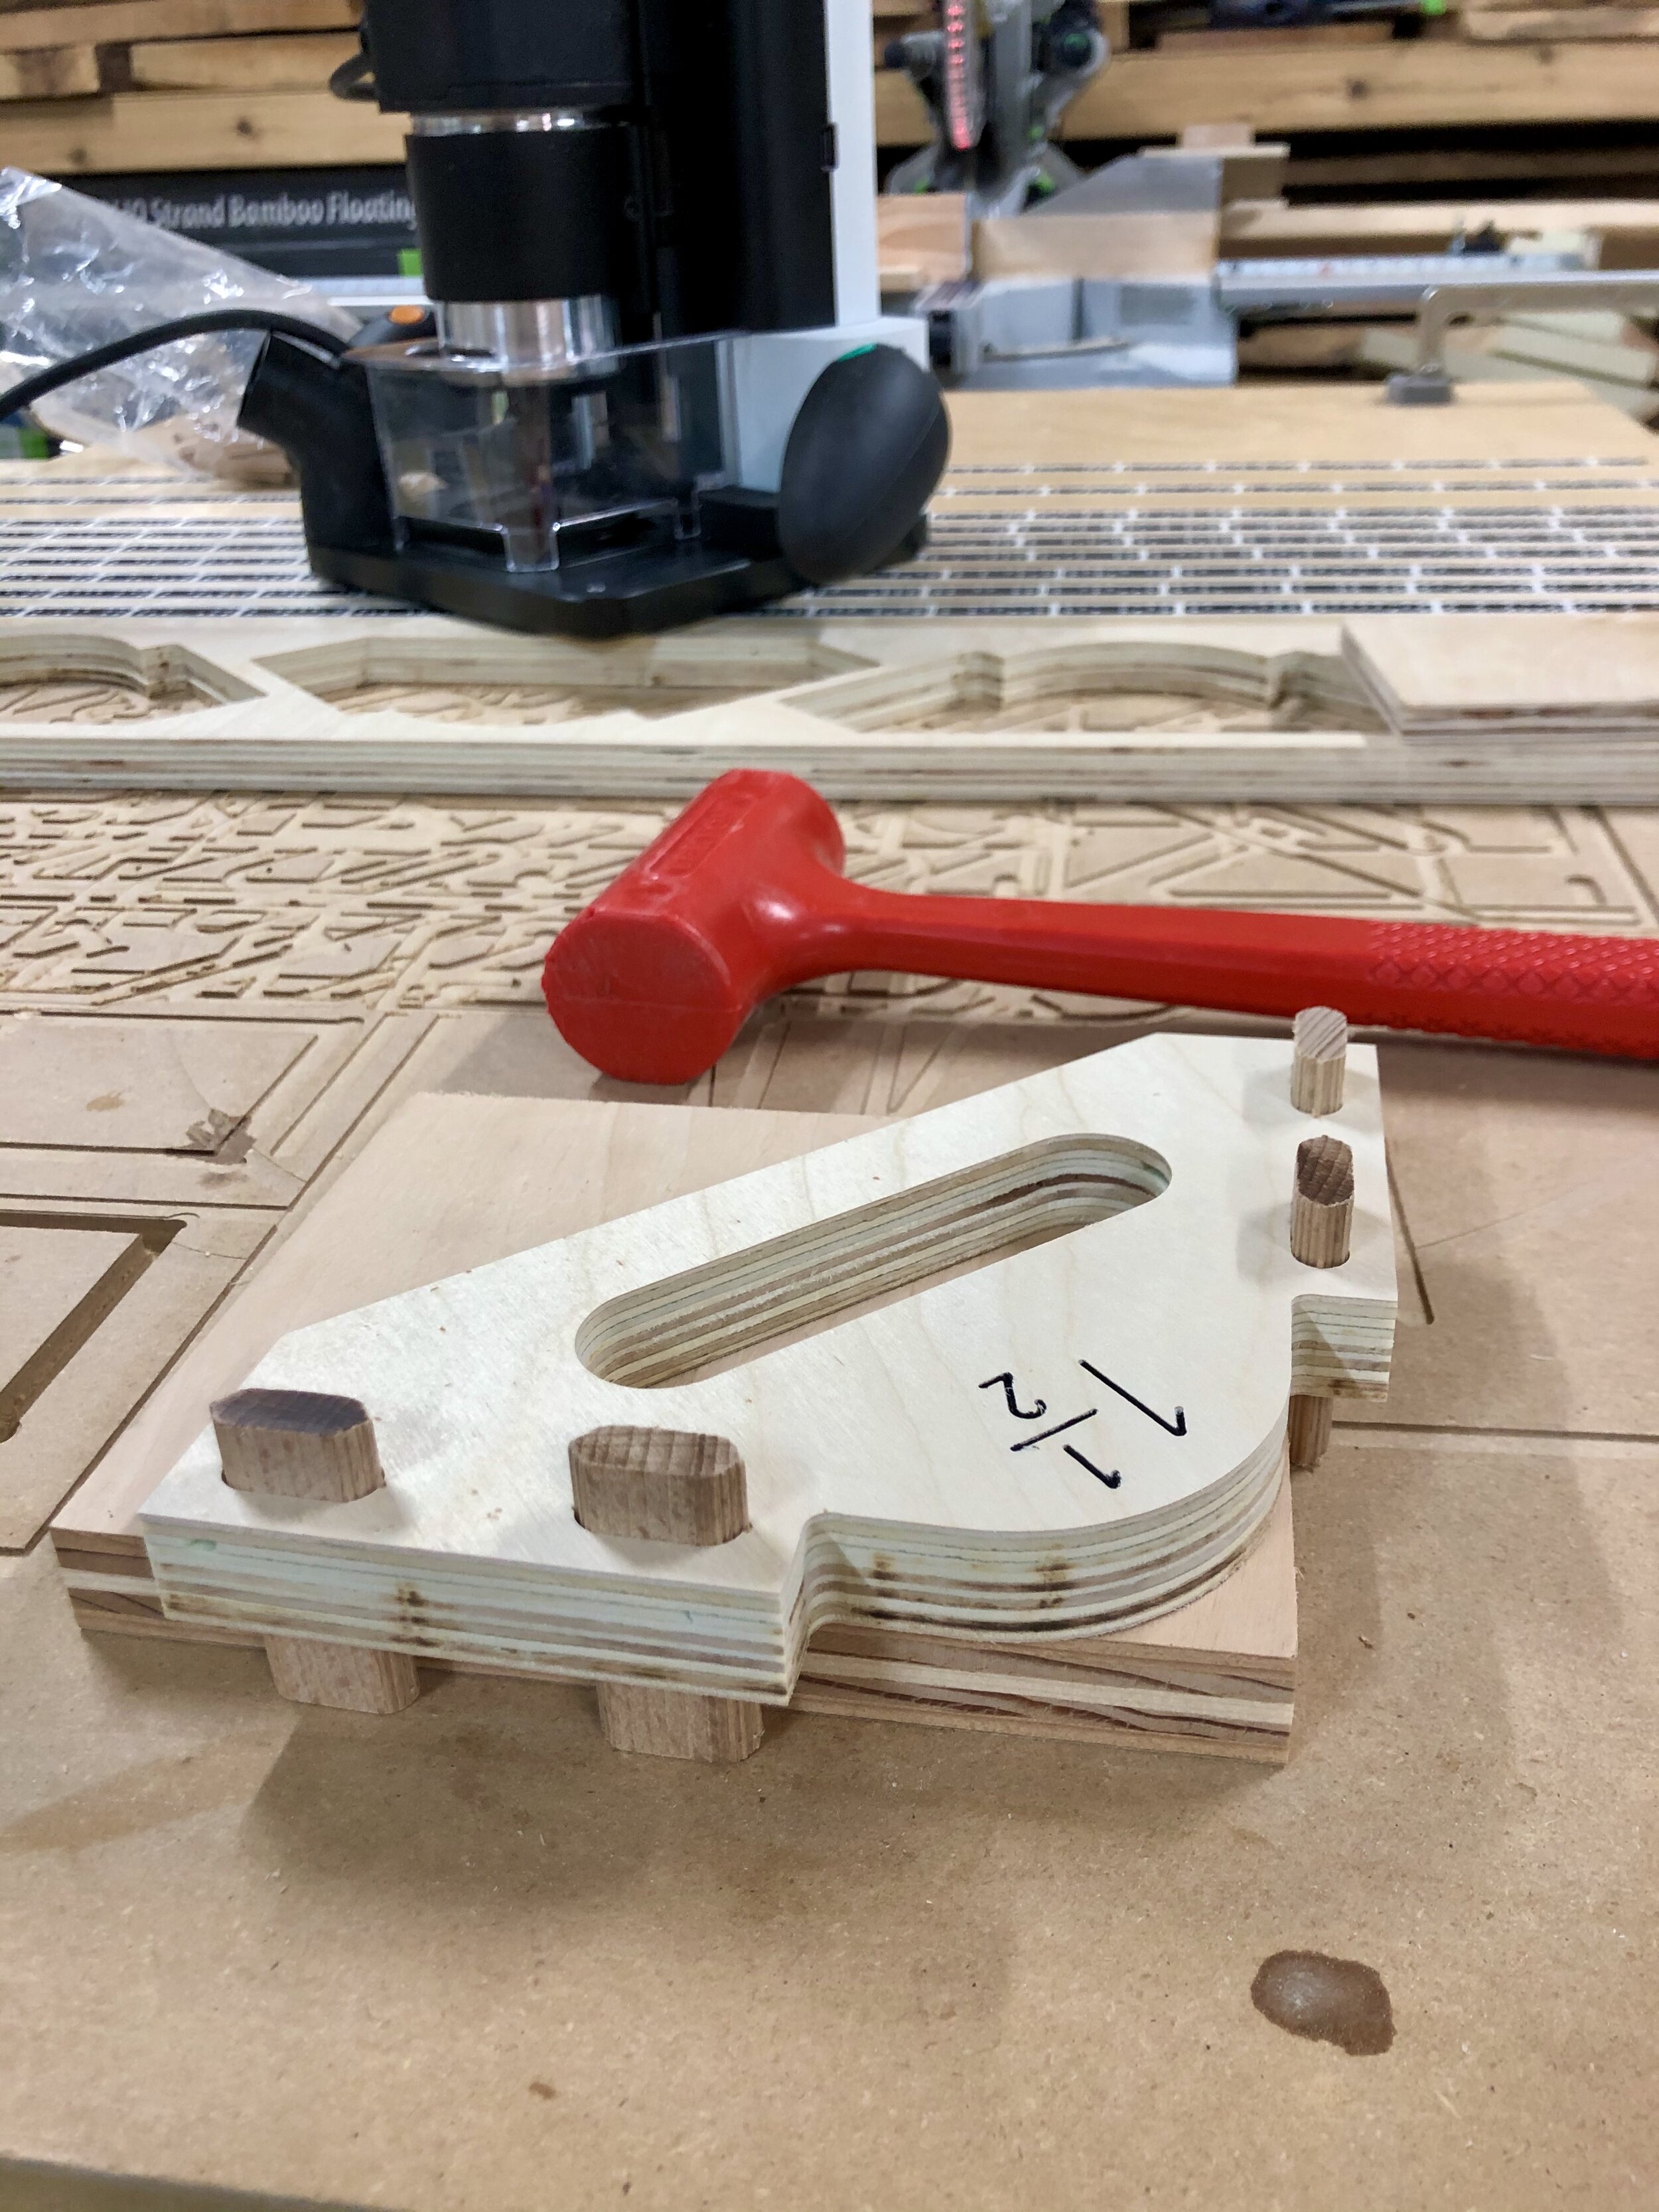
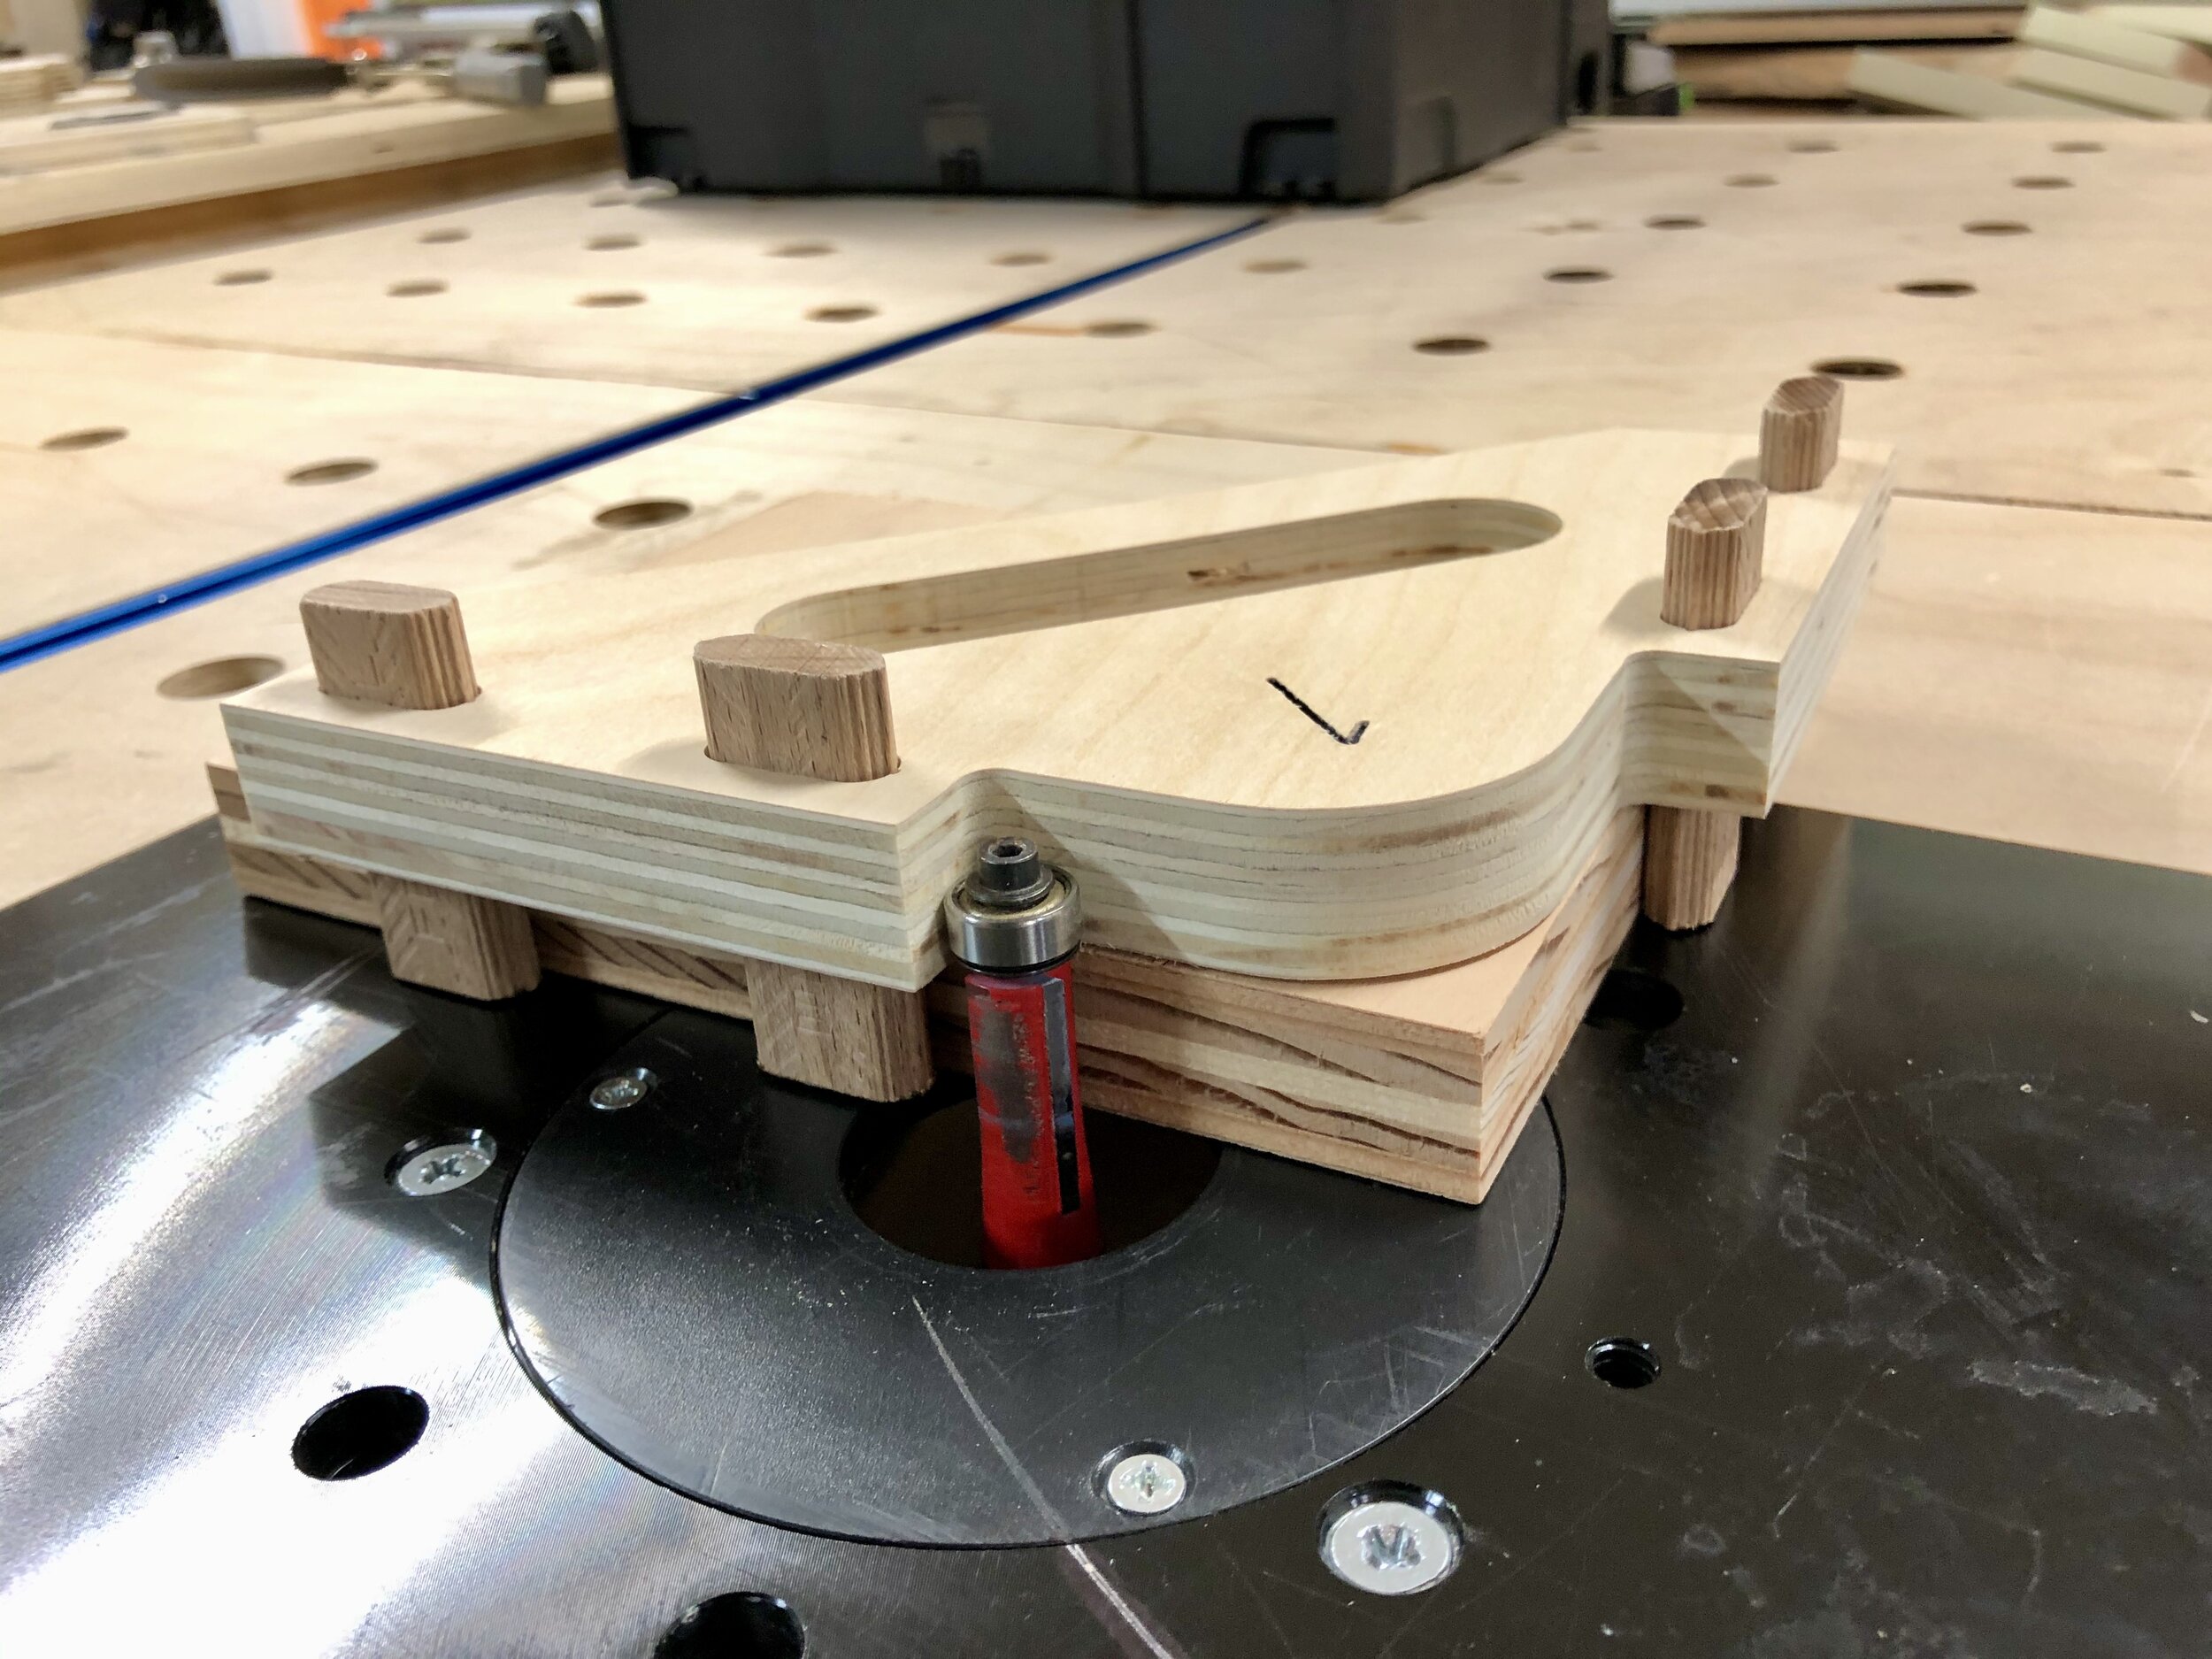
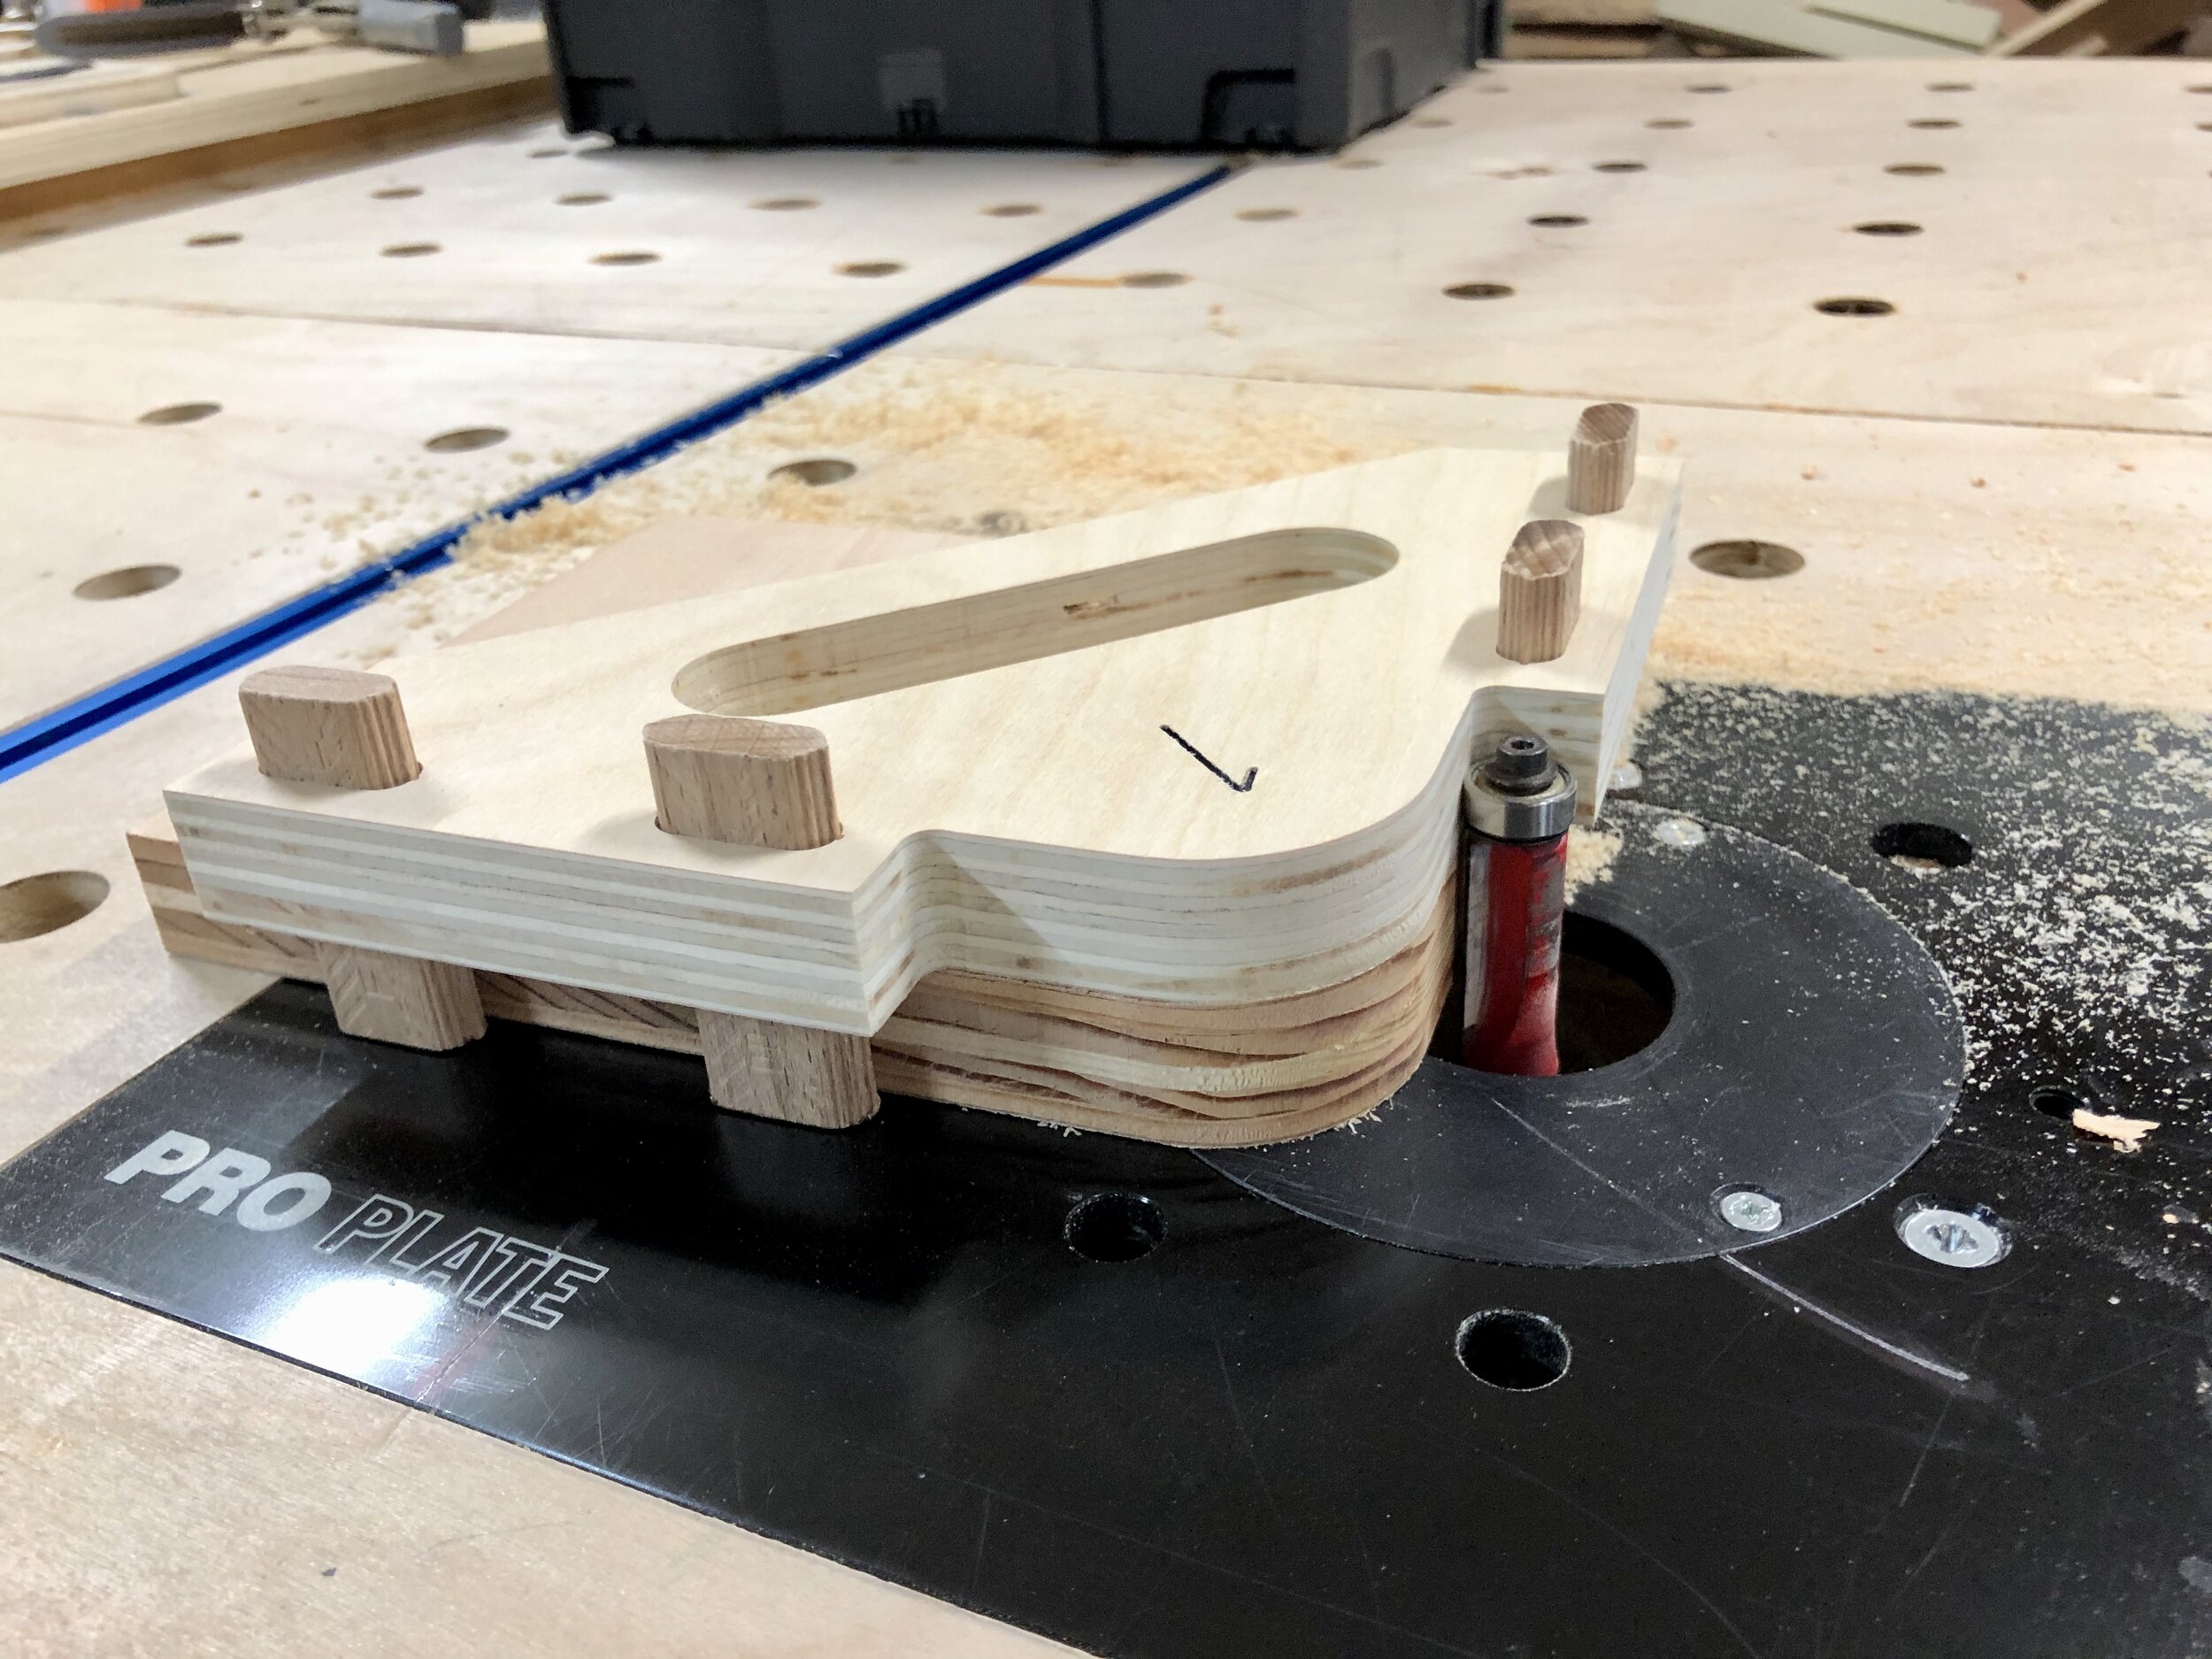
Make sure to cut out the Domino mortises and handle BEFORE cutting around the outside of each jig. Once you cut the outside of the jig you won’t be able to cut the internal mortises or handle.
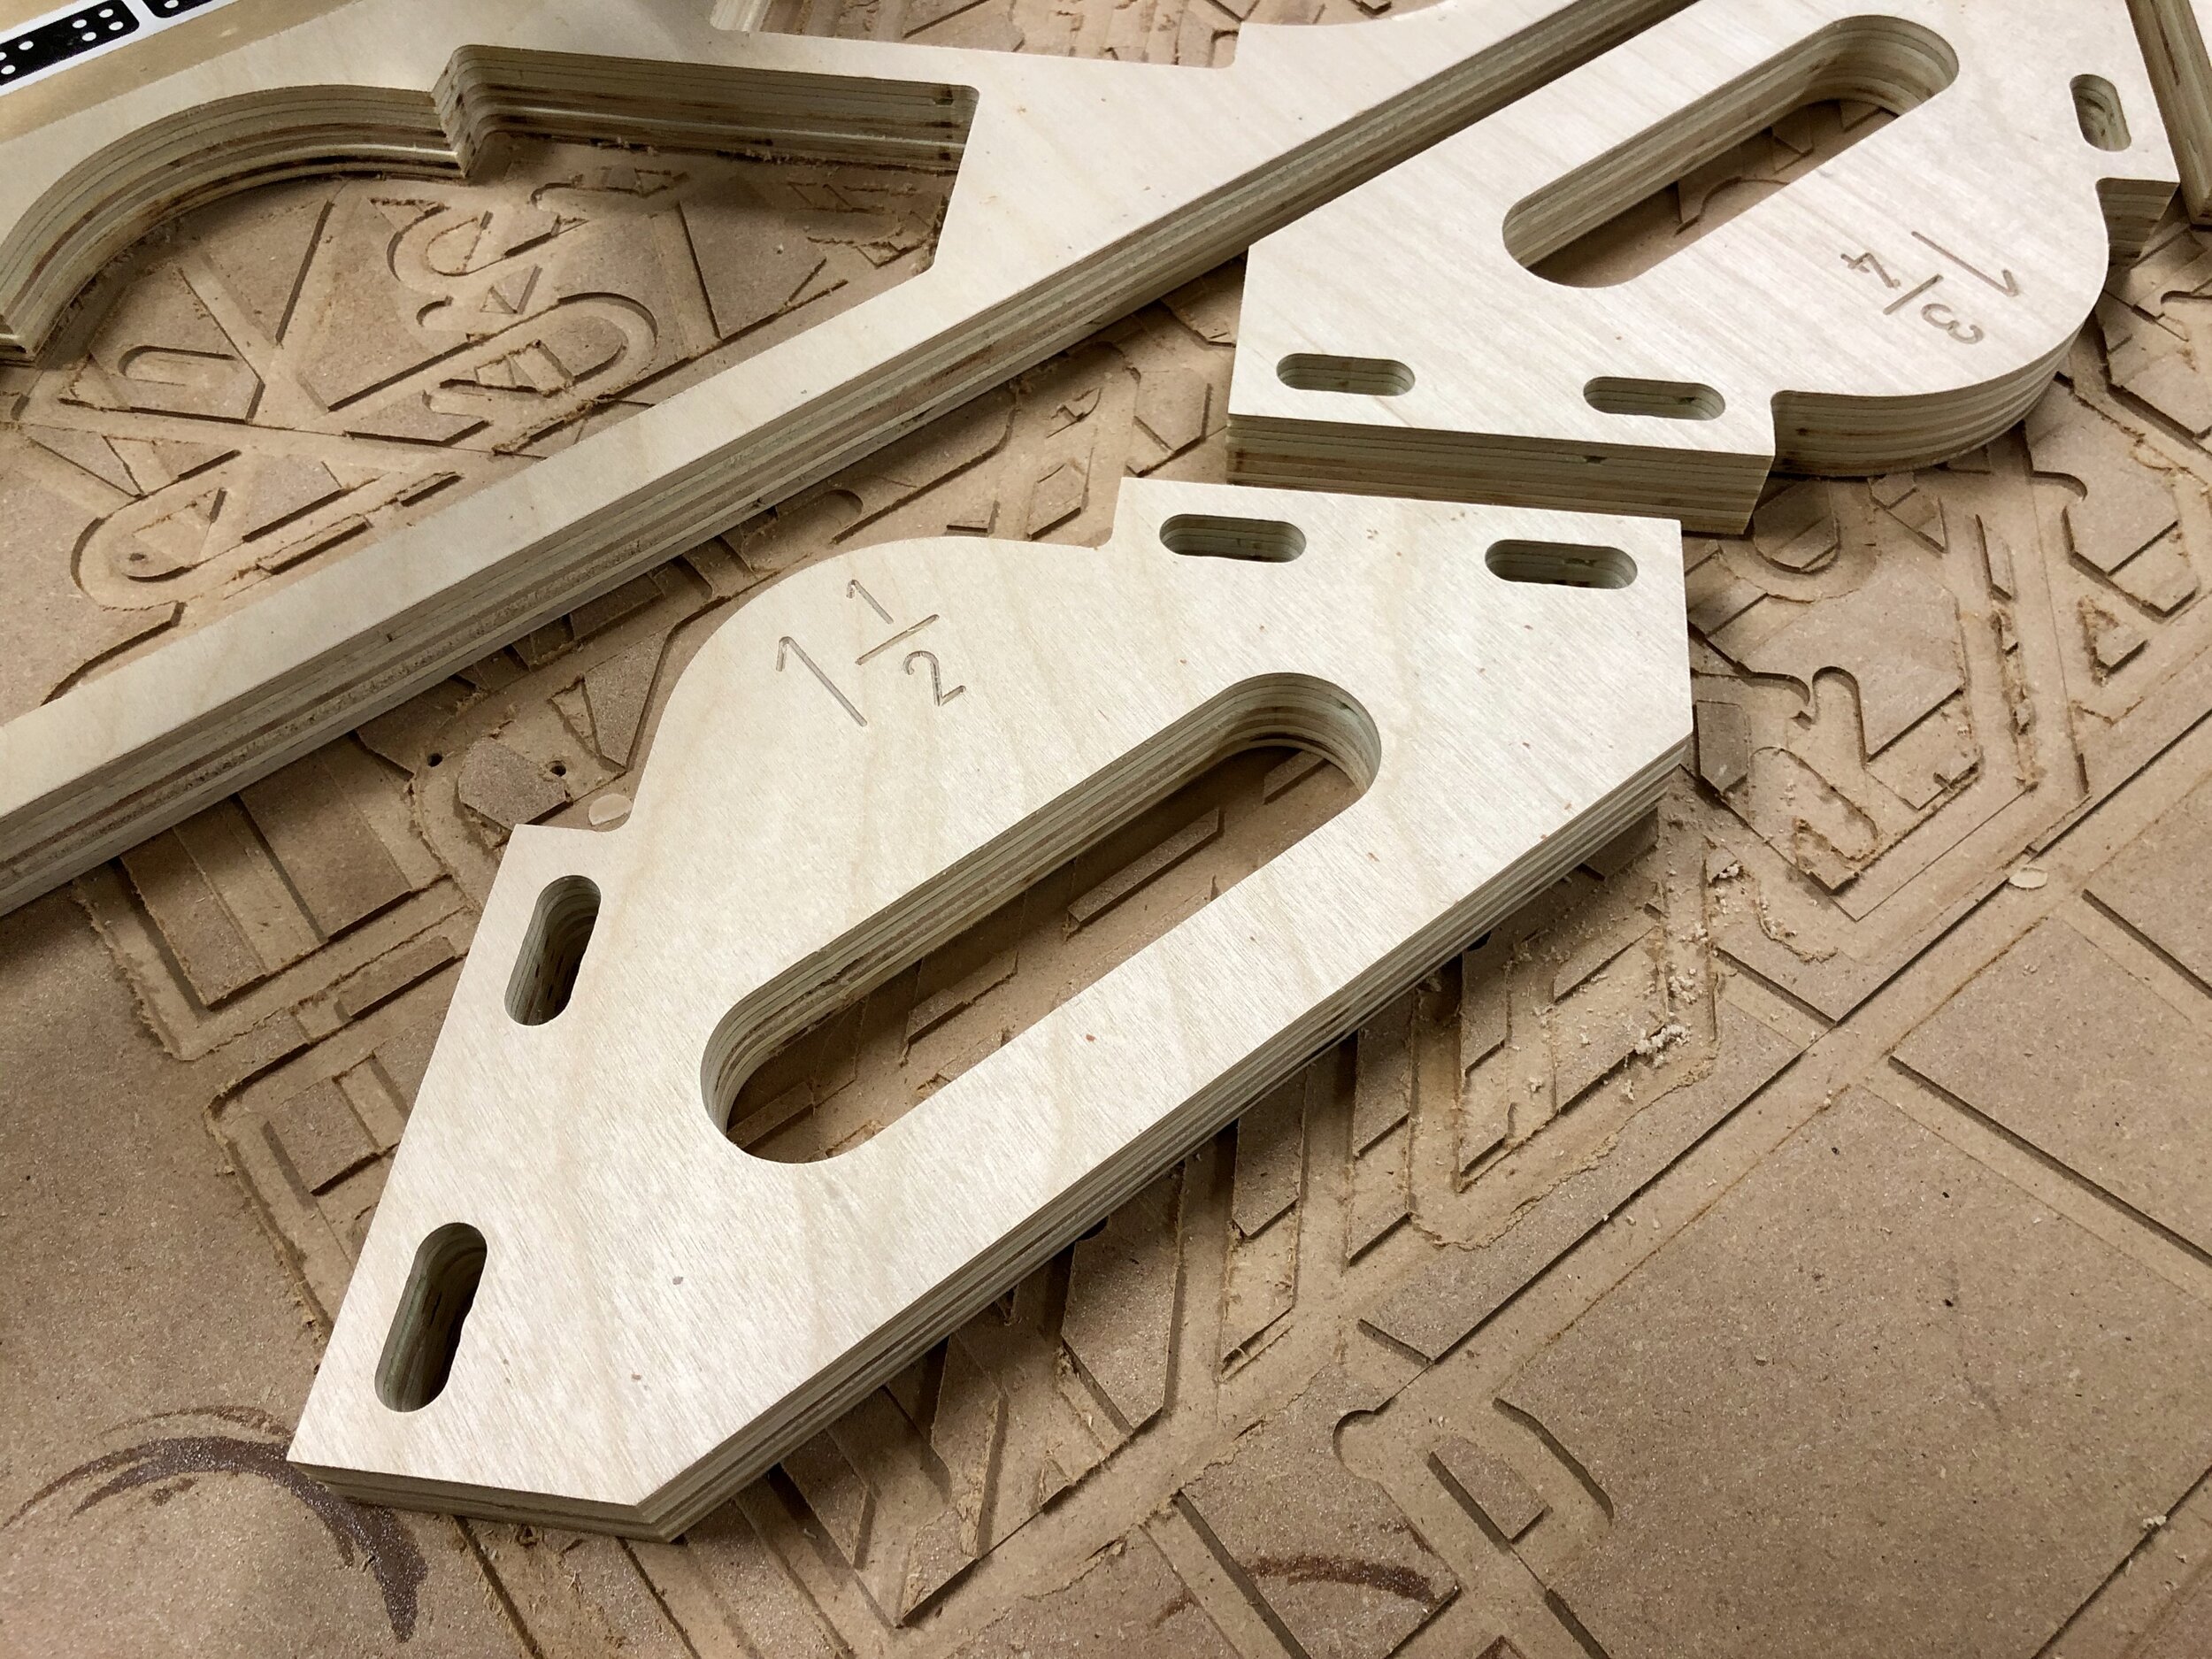
(Opt) Use a fine tip Sharpie to color in the radius measurement
7. (Opt) Sand off about 5mm of the length of each 8mm x 50mm Domino. (The reason will be made clear in the next couple of steps.)
8. Lay the jig on a flat work surface; insert the Dominoes and tap them down so they are flat with the underside of the jig.
9. Now put the jig on a piece of 3/4” plywood and tap the Dominoes down to the work surface. If you’re sanding 5mm off of the Dominoes in Step 7, you’ll now have the correct length for 3/4” material on one side and 1/2” material on the other WITHOUT having to adjust the Dominoes. ;-) You could glue them in place but since the mortises will be tight it’s not necessary. Plus you can adjust the height of them later if needed.
10. I glued and nailed the rack pieces to the side of the rack divider.
To use them just put the jig over the material, adjust the height of the router guide bit so the guide bearing is riding against the jig and hold the jig tight against the corner of the work piece.

I’m pretty happy with how they turned out. I may add a couple of strips of thin rubber to the underside to help from it slipping but I can do that later.
Individual .svg files:
Corner Jig 1/4”
Corner Jig 1/2”
Corner Jig 3/4”
Corner Jig 1”
Corner Jig 1-1/4"
Corner Jig 1-1/2”
Corner Jig 1-3/4”
Corner Jig 2”
Rack
Please let me know if you have any comments or would like me to create another size jig.
As always, I hope this helps.
Cheers,
Lee


