Let There Be Light!
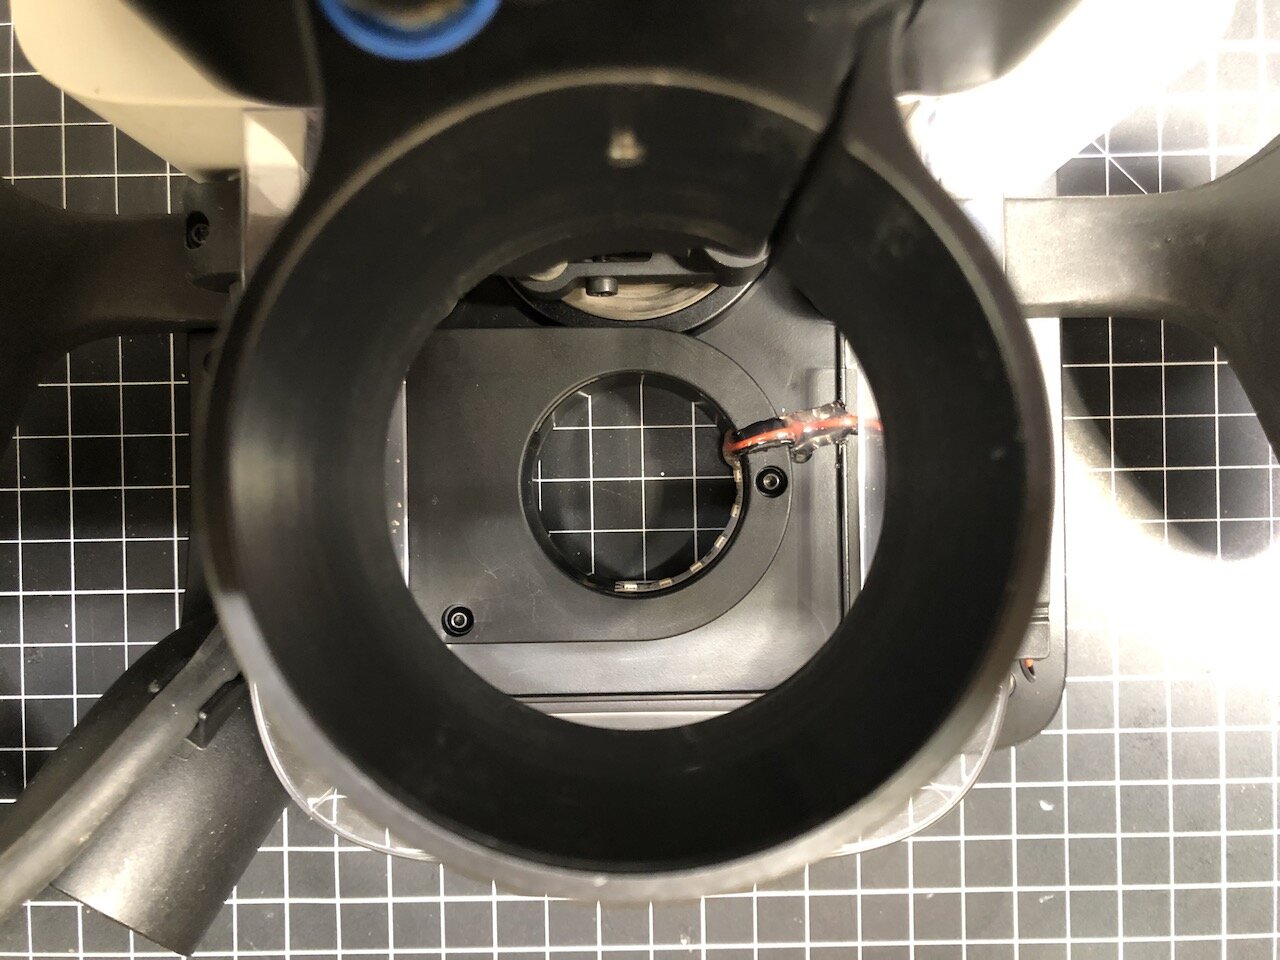
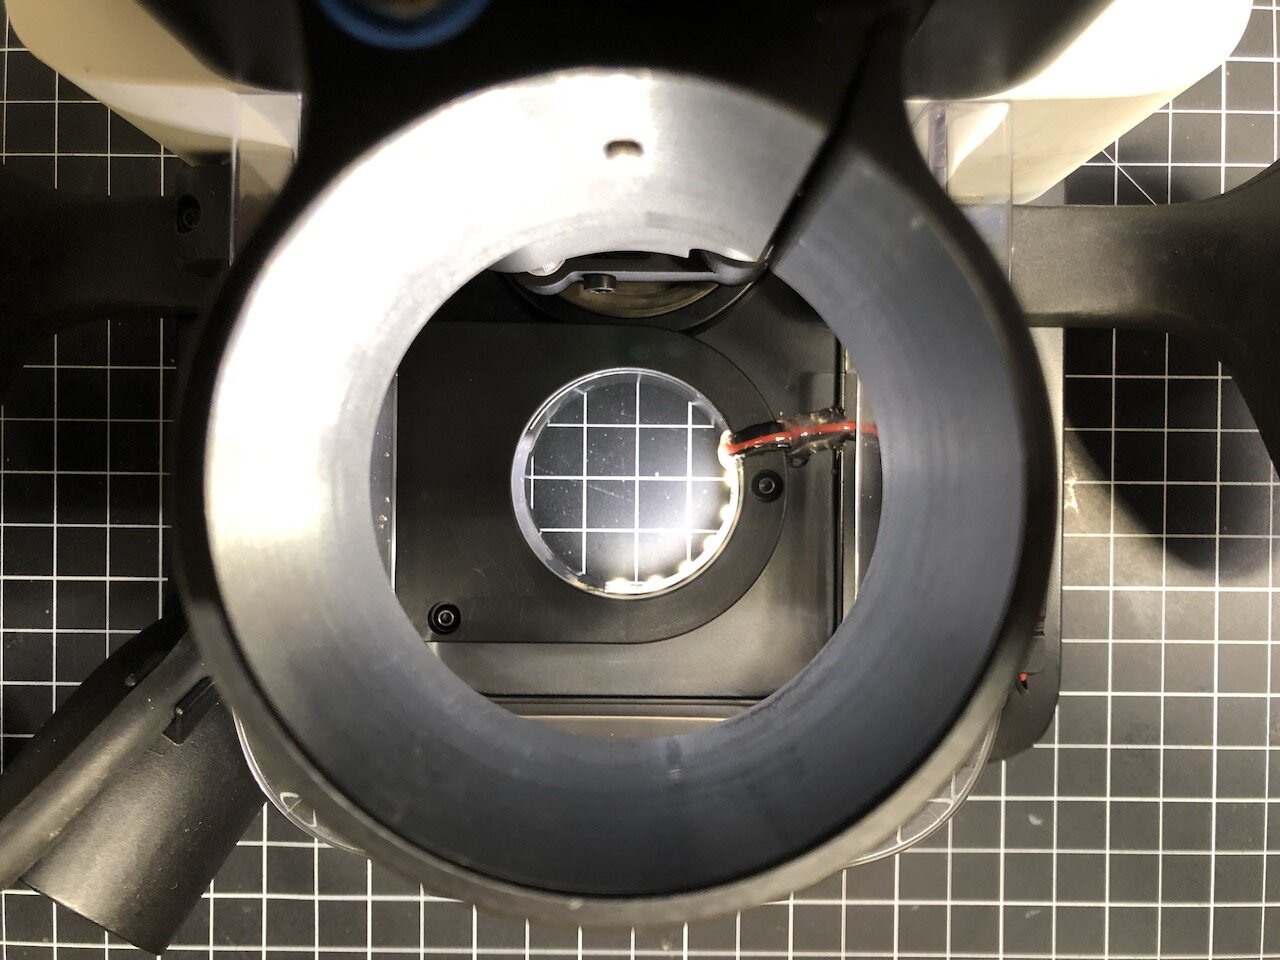
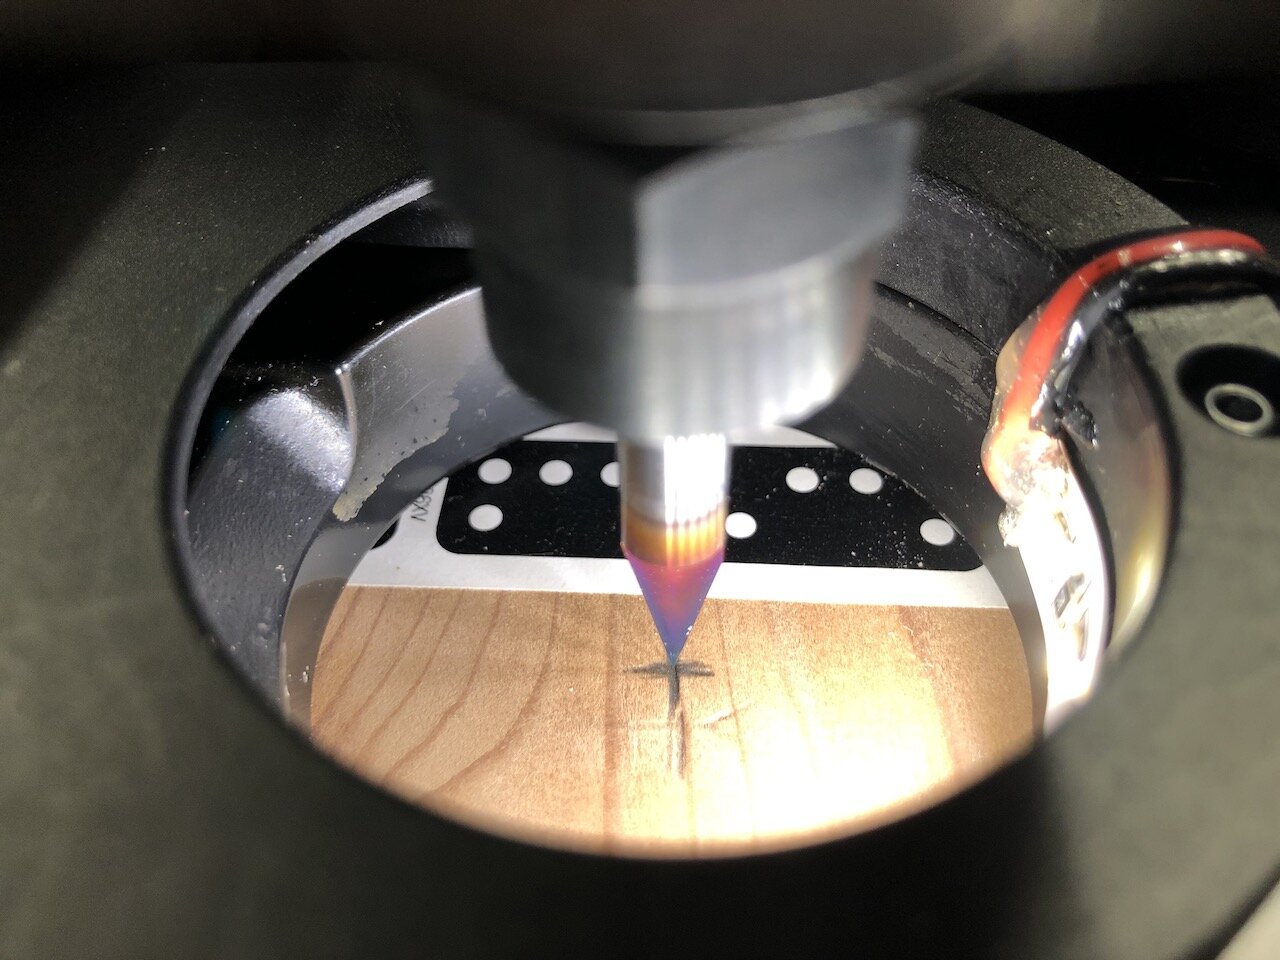
With the new Shaper Origin firmware update (Humboldt), creating virtual Grids has been overhauled and now you can create grids in the middle of a work piece by probing reference marks drawn on the surface of the material. As soon as I saw Sam from Shaper demo this I immediately thought “It would be great if there was a light closer to the bit so you could see the tip of the engraving bit centered over a reference mark.”
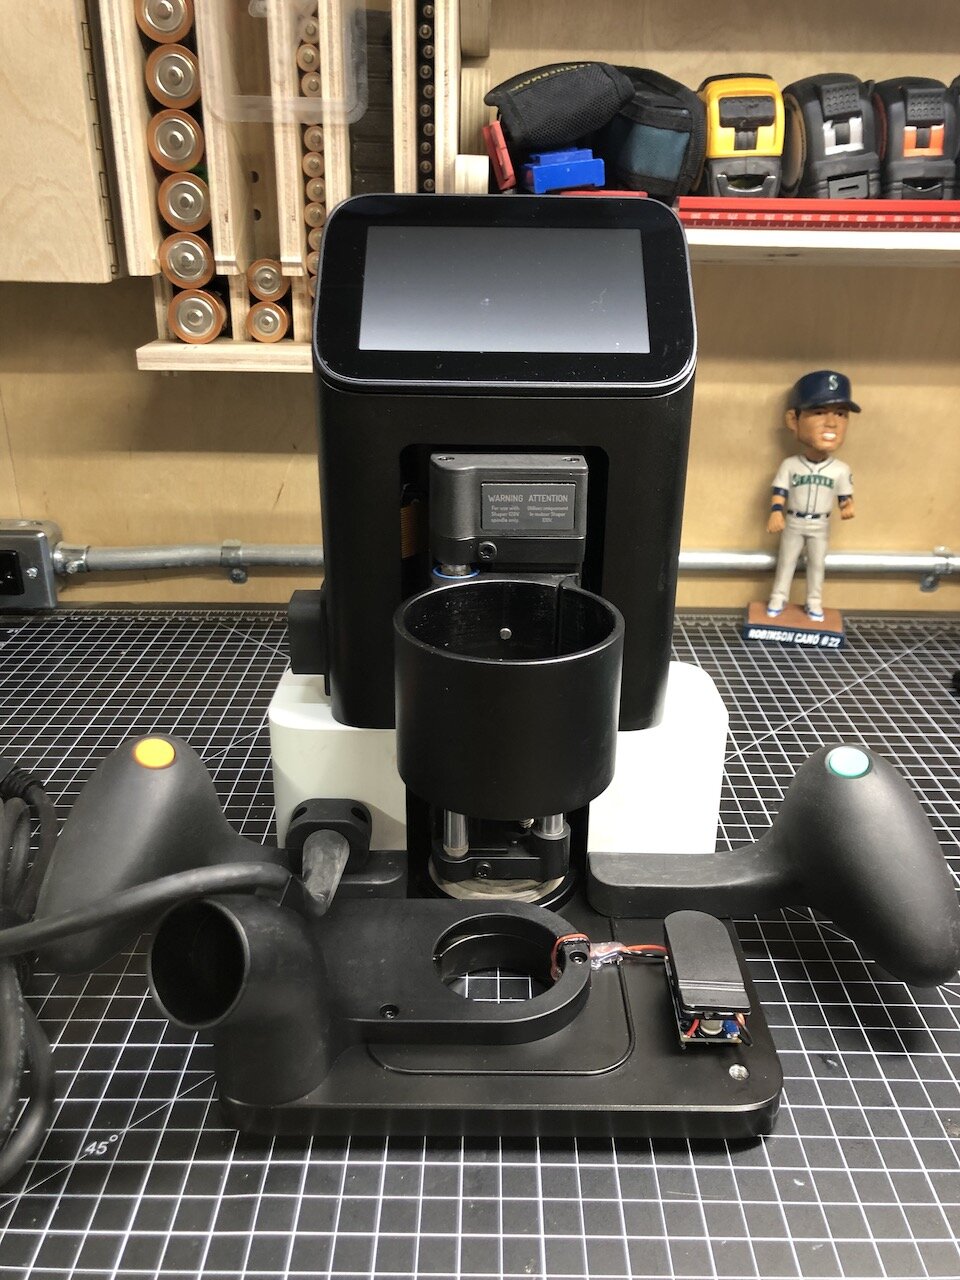
I had some left over LED strips from some previous projects and wondered if there was a way to power this on the Origin. I considered powering the LED lights via a plug-in cable but it seemed a bit of a pain to wire up a whole power supply for such a small amount of LEDs. I also considered powering them from the the Origin itself (for about a minute) and then thought “Well that will void any kind of warranty, etc. etc.” and didn’t really want to take the Origin apart (yet ;-) ).
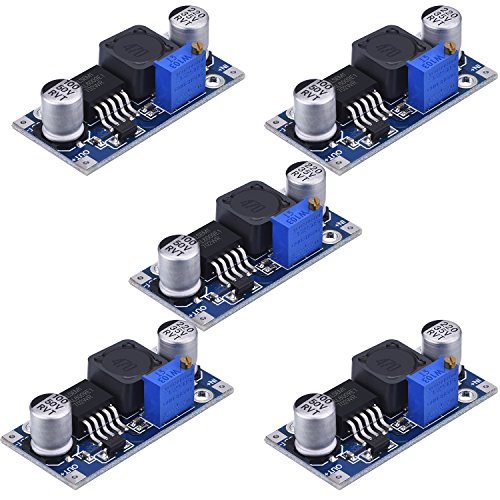
So then I thought “Surely, there is a way to power these few LEDs from a battery.” Unfortunately, I had some High Output, 24V lights so I needed to figure out a way to power them from batteries. Now, I will be the first to admit I know nothing about electronics, and I’m not even that good at soldering, so after Googling “how to power LEDs from batteries” I purchase the following:
Boost converter module (This allows you to step up to the desired voltage using a dial.)
For this experiment I’m using two CR2032 batteries that are 3V each. So I’m stepping up from 6V to 24V. I’m also only using one section of the LED strip, which consists of 6 LEDs.
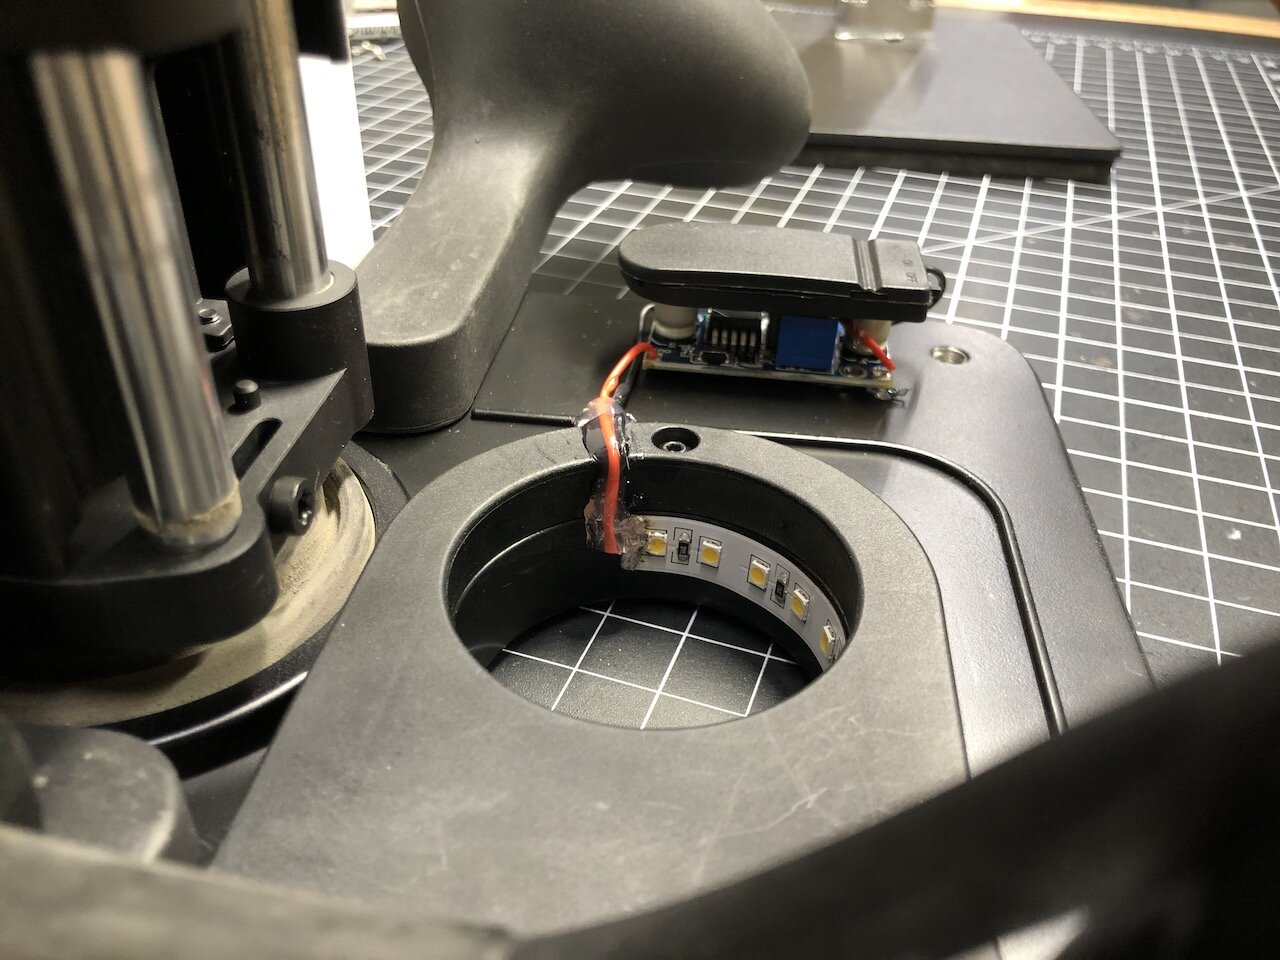
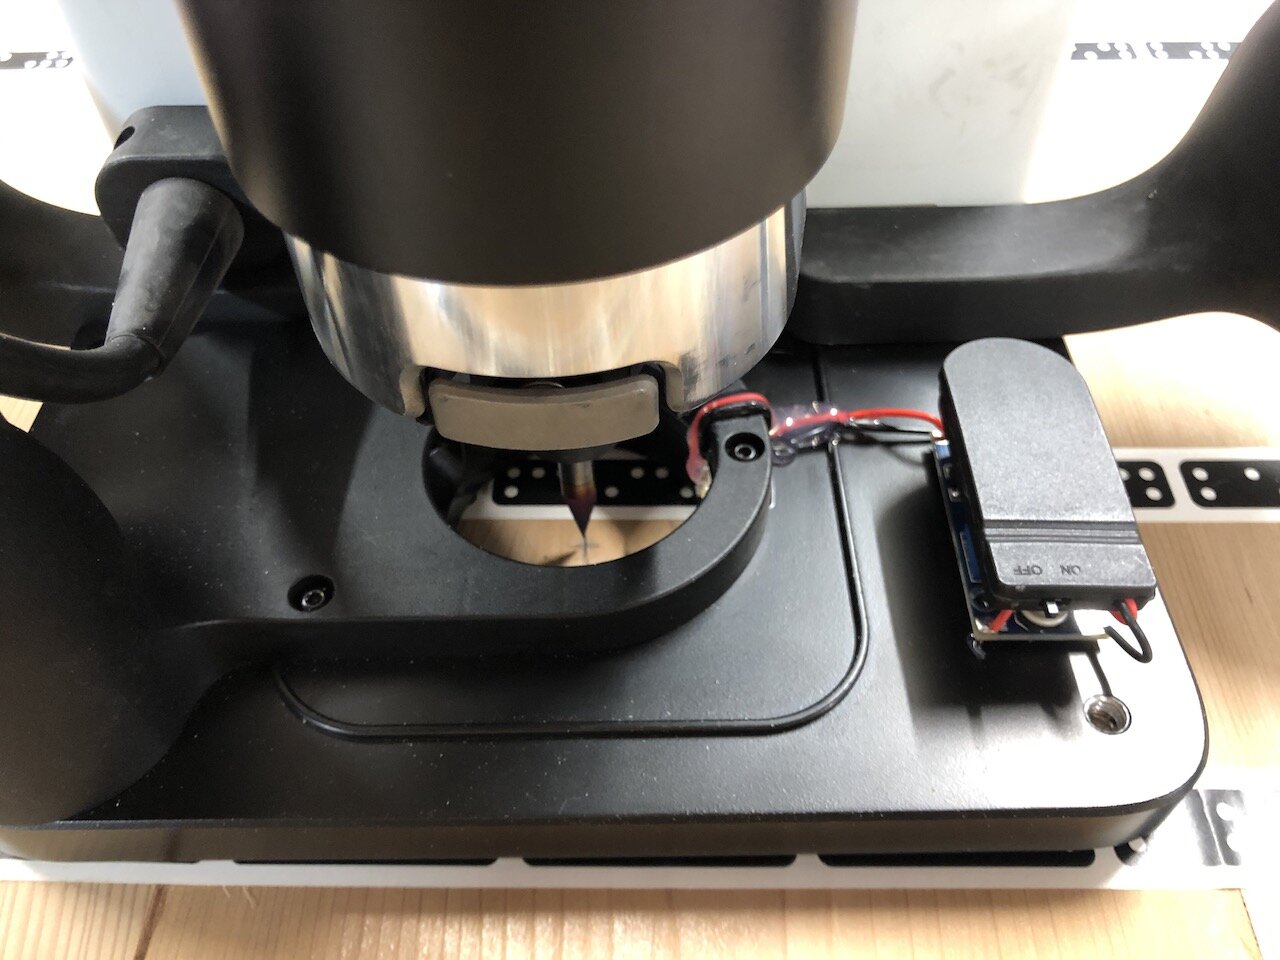
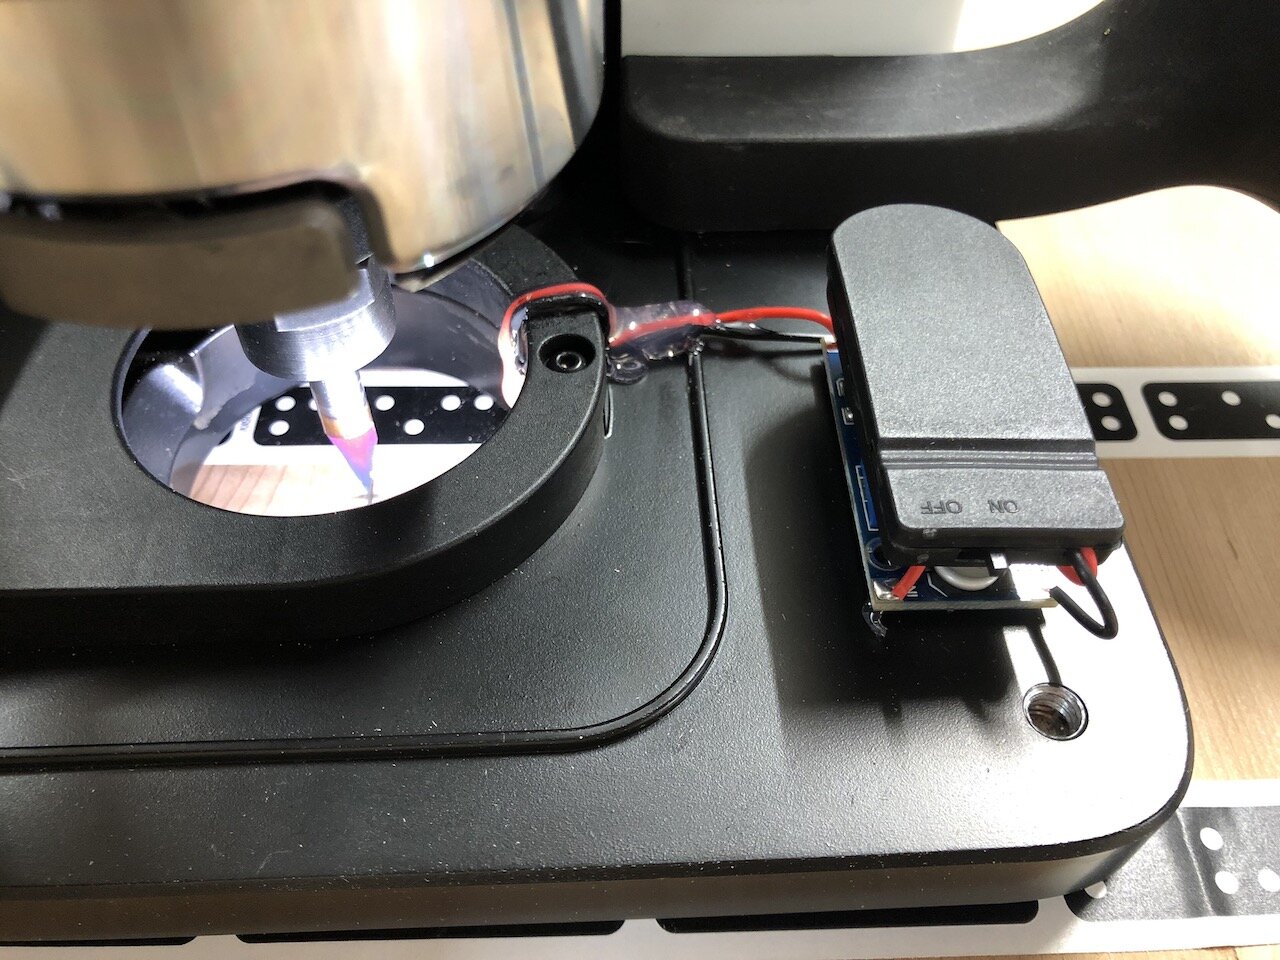
I’ve very aware that the LEDs and wiring are “in the danger zone” of the router bit so I’ve hot glued the wiring down and I’ll be keeping a very close eye on it.
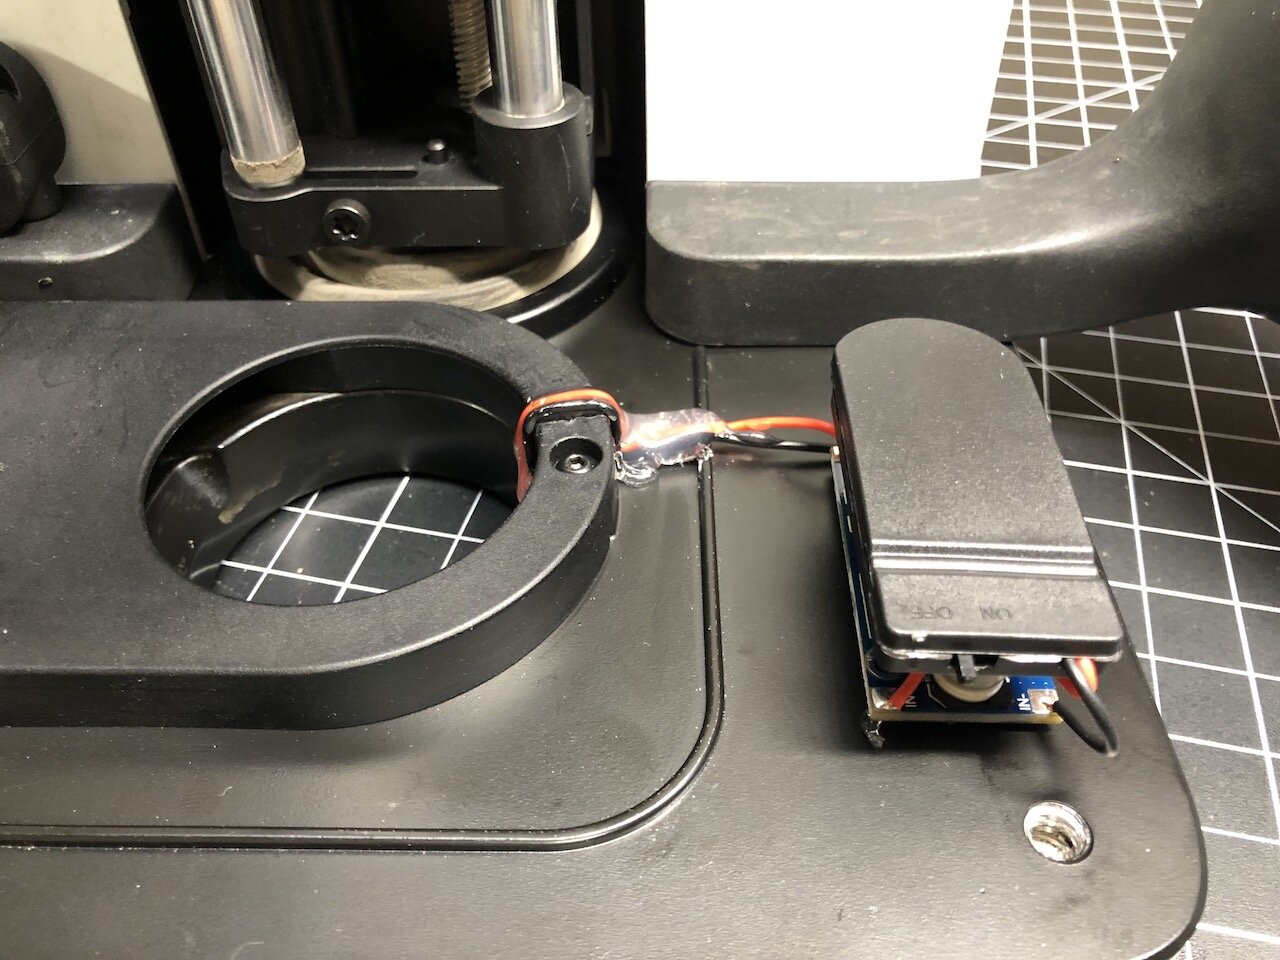
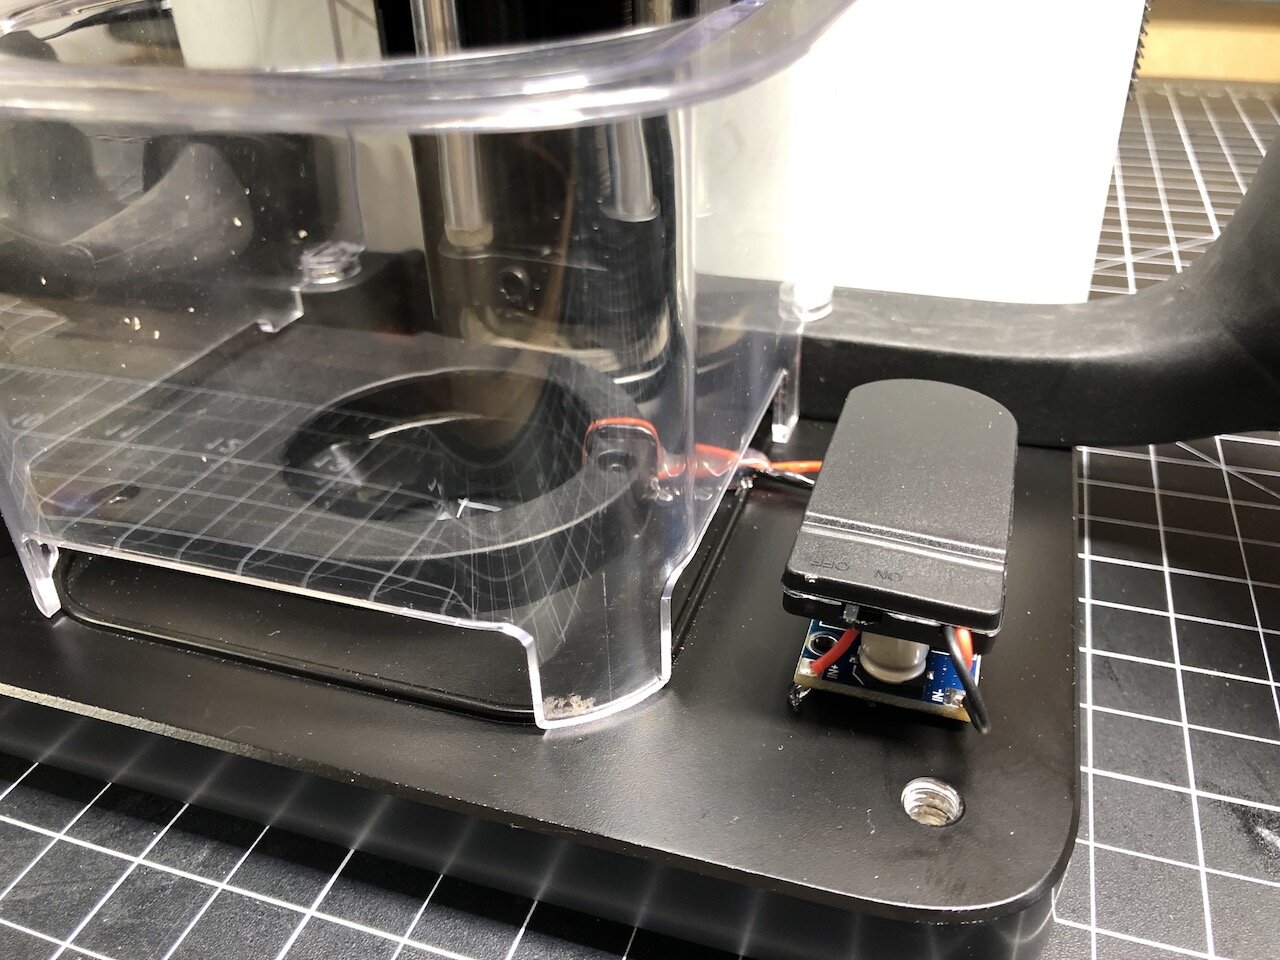
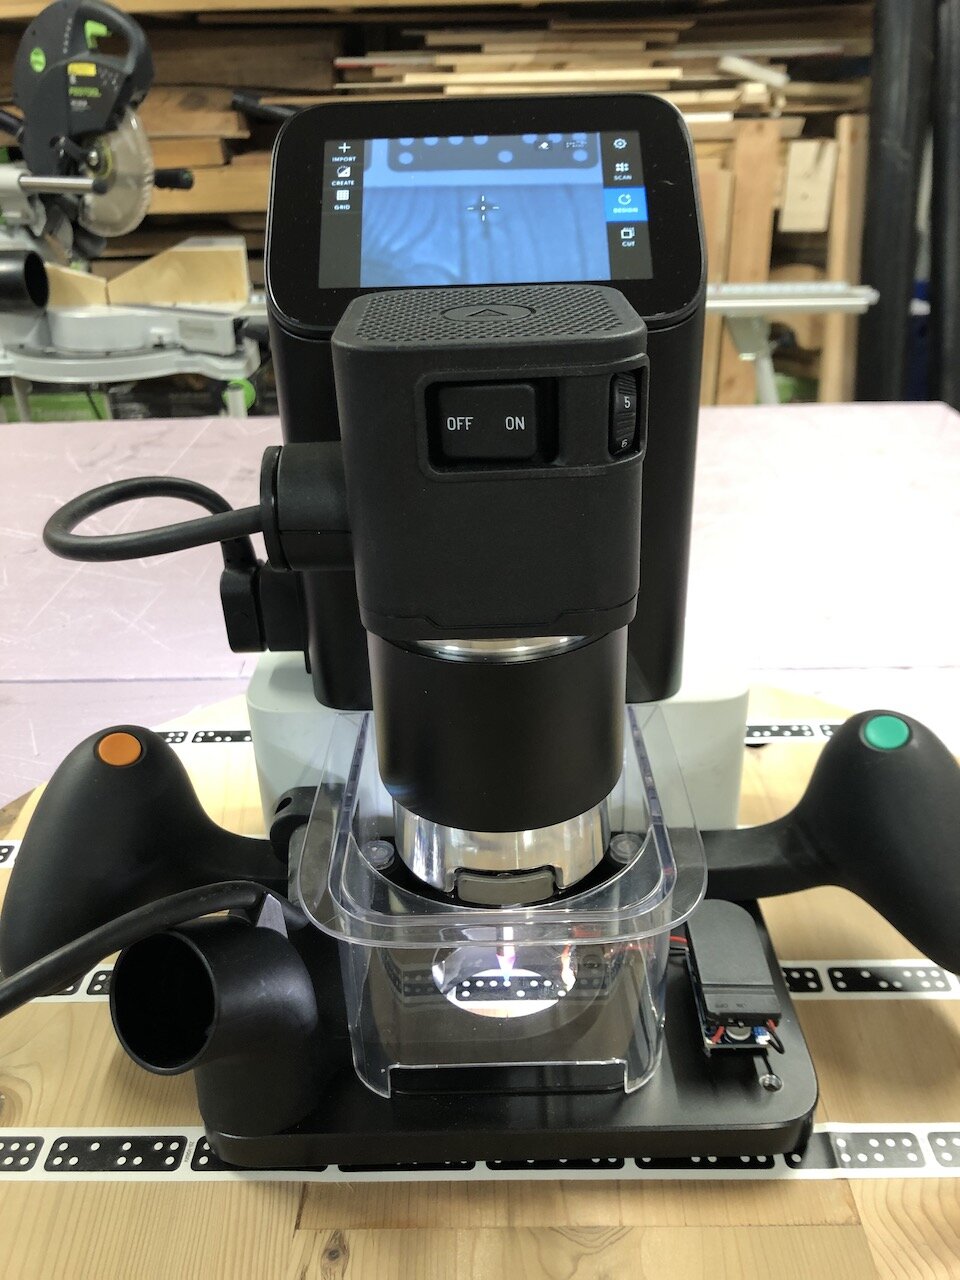
I’m still playing around with it but the initial concept works. For some reason the voltage is dropping after about 10 seconds, which causes the lights to dim and then turn off. I may end up switching to a 9V battery at some point. Ideally if I had a 3D printer I would design and print a case for the step-up converter, batteries and switch so I didn’t have to worry about dust but this is just a prototype.
With any router it’s so hard to see the bit when it’s lowered into a cutting position so I’m actually considering applying this mod to my other Festool routers so I can see more clearly where the router bit is at any point. We’ll see how the LEDs hold up but if I were to start from scratch I would probably use some waterproof LEDs since they are encased in a plastic that would protect them. Of course, the downside is that this stick out further, but anyway we’ll see how they work out.
Anyway, if you have any tips, tricks or comments that can help please leave them below.
As always, I hope this was helpful.
Cheers,
Lee